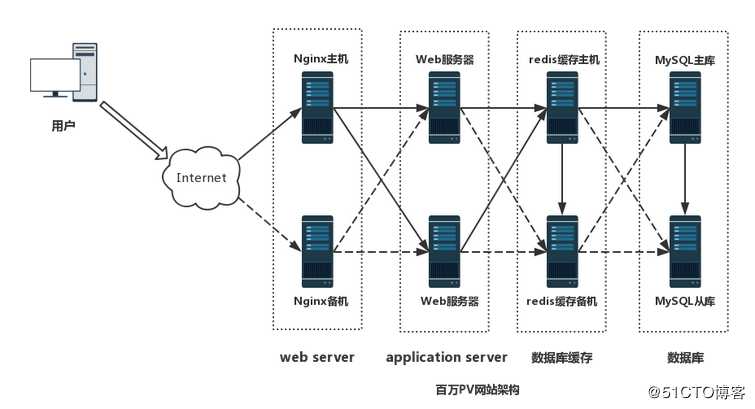
PV即点击量,通常是衡量一个网络新闻频道或网站甚至一条网络新闻的重要指标。PV从某种程度上已经成为投资者衡量商业网站表现的最重要的尺度。PV是一个访问者在24小时到底看了网站的几个页面。本案例设计采用四层模式实现,主要分为前端反向代理,web层,数据库缓存层和数据库层。前端反向代理层采用主备模式,web层采用集群模式,数据库缓存采用主备模式,数据库层采用主从模式。主:192.168.177.145 centos7-1
从:192.168.177.135 centos7-2
节点1:192.168.177.132 centos7-3
节点2:192.168.177.133 centos7-4
主服务器 从服务器
#rpm -ivh http://nginx.org/packages/centos/7/noarch/RPMS/nginx-release-centos-7-0.el7.ngx.noarch.rpm使用centos 默认仓库完成下面的安装 主#yum install -y keepalived nginx#vim /etc/keepalived/keepalived.conf //从上修改三个参数! Configuration File for keepalivedvrrp_script nginx {script "/opt/shell/nginx.sh"interval 2} //添加global_defs {route_id NGINX_HA //修改}vrrp_instance VI_1 {state MASTERinterface ens33virtual_router_id 51priority 100advert_int 1authentication {auth_type PASSauth_pass 1111}track_script {nginx}virtual_ipaddress {192.168.177.188 //虚拟IP192.168.200.188}}#mkdir /opt/shell #cd /opt/shell#vim /opt/shell/nginx.sh#!/bin/bashk=`ps -ef | grep keepalived | grep -v grep | wc -l`if [ $k -gt 0 ];then/bin/systemctl start nginx.serviceelse/bin/systemctl stop nginx.servicefi#chmod +x /opt/shell/nginx.sh //变成可执行的脚本#yum install -y keepalived nginx#vim /etc/keepalived/keepalived.conf //从上修改三个参数! Configuration File for keepalivedvrrp_script nginx {script "/opt/shell/nginx.sh"interval 2} //添加global_defs {route_id NGINX_HB //修改}vrrp_instance VI_1 {state MASTERinterface ens33virtual_router_id 52priority 90advert_int 1authentication { auth_type PASS auth_pass 1111}track_script {nginx}virtual_ipaddress {192.168.177.188 //虚拟IP192.168.200.188}}#mkdir /opt/shell#cd /opt/shell#vim /opt/shell/nginx.sh#!/bin/bashk=`ps -ef | grep keepalived | grep -v grep | wc -l`if [ $k -gt 0 ];then/bin/systemctl start nginx.serviceelse/bin/systemctl stop nginx.servicefi#chmod +x /opt/shell/nginx.sh //变成可执行的脚本
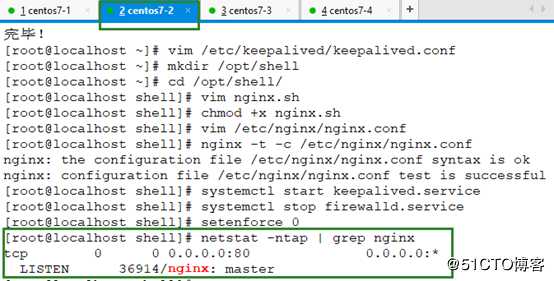
#vim /etc/nginx/nginx.conf //在#gzip on;下面添加: upstream tomcat_pool { server 192.168.177.132:8080; server 192.168.177.133:8080; ip_hash; #会话稳固功能,否则无法通过vip地址登陆 } server { listen 80; server_name 192.168.177.188; #虚拟出的IP location / { proxy_pass http://tomcat_pool; proxy_set_header X-Real-IP $remote_addr; } }#nginx -t -c /etc/nginx/nginx.conf //测试配置文件语法#systemctl start keepalived.service //nginx启动会等待一会#tar xf apache-tomcat-8.5.23.tar.gz#tar xf jdk-8u144-linux-x64.tar.gz#mv apache-tomcat-8.5.23/ /usr/local/tomcat8#mv jdk1.8.0_144/ /usr/local/java#vim /etc/profileexport JAVA_HOME=/usr/local/javaexport JRE_HOME=/usr/local/java/jreexport PATH=$PATH:/usr/local/java/binexport CLASSPATH=./:/usr/local/java/lib:/usr/local/java/jre/lib#source /etc/profile#java -version大型网站架构之百万PV#ln -s /usr/local/tomcat8/bin/startup.sh /usr/bin/tomcatup#ln -s /usr/local/tomcat8/bin/shutdown.sh /usr/bin/tomcatdown#tomcatup //开启服务#netstat -anpt | grep 8080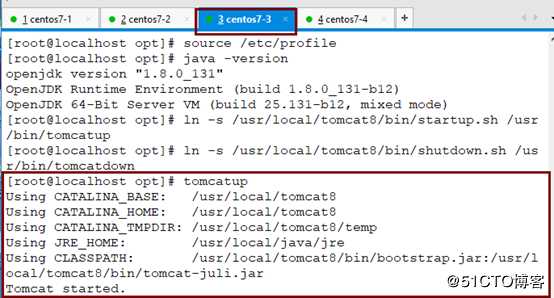

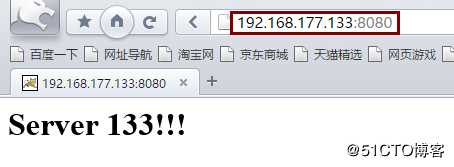
#vim /usr/local/tomcat8/webapps/ROOT/index.jsp //修改默认网页内容<h1>Server 132!!!</h1>http://192.168.177.132:8080/ //测试默认测试页是否正常显示(节点)http://192.168.177.133:8080/http://192.168.177.188/ 输入调度器地址,也就是虚拟地址,测试两台节点的调度情况。将192.168.177.132宕机(tomcatdown),看看http://192.168.177.188/会不会显示<h1>Server 133!!!</h1>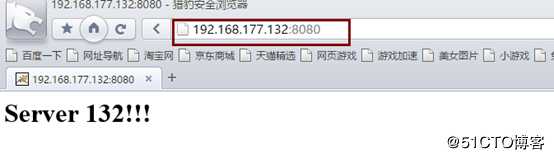

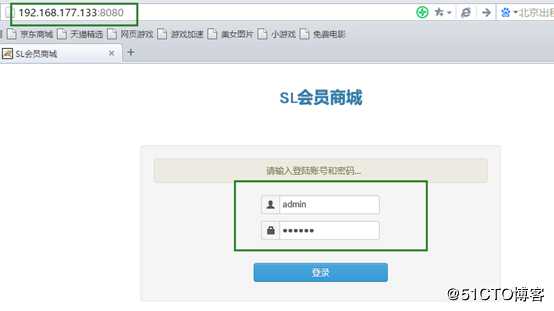
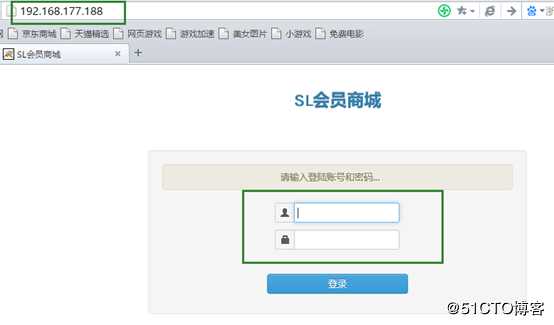
#vim server.xml //跳到行尾,在Host name下新增 148行<Context path="" docBase="SLSaleSystem" reloadable="true" debug="0"></Context>日志调试信息debug为0表示信息越少,docBase指定访问目录Mysql安装(主,从)#yum install -y mariadb-server mariadb#systemctl start mariadb.service#systemctl enable mariadb.service //开机自启动#netstat -anpt | grep 3306#mysql_secure_installation //常规安全设置#mysql -u root -p先挂载#mysql -u root -p < slsaledb-2014-4-10.sql#mysql -u root -p show databases; GRANT all ON slsaledb.* TO ‘root‘@‘%‘ IDENTIFIED BY ‘abc123‘; flush privileges;大型网站架构之百万PV以下在两台tomcat节点做#tar xf SLSaleSystem.tar.gz -C /usr/local/tomcat8/webapps/#cd /usr/local/tomcat8/webapps/SLSaleSystem/WEB-INF/classes#vim jdbc.properties //修改数据库IP地址是VRRP的虚拟IP,以及授权的用户名root和密码abc123。大型网站架构之百万PV网站测试http://192.168.177.132:8080/ //默认的用户名admin 密码:123456http://192.168.177.133:8080/http://192.168.177.188 //输入虚拟地址测试登录,并且关闭主再测试登录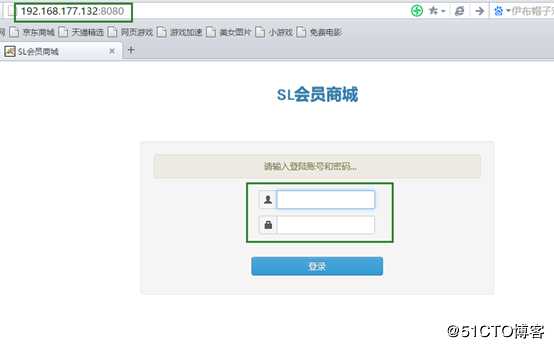
#yum install -y epel-release#yum install redis -y#vim /etc/redis.conf bind 0.0.0.0#systemctl start redis.service#netstat -anpt | grep 6379#redis-cli -h 192.168.177.145 -p 6379 //测试连接 192.168.177.145:6379> set name test //设置name 值是test 192.168.177.145:6379> get name //获取name值```266行 slaveof 192.168.177.145 6379 //主服务器的IP不是虚拟IP
#redis-cli -h 192.168.177.135 -p 6379 //登录从,获取值,成功说明主从同步成功
192.168.177.135:6379> get name
"test"
## 大型网站架构之百万PV配置商城项目中连接redis的参数
38 <!--redis 配置 开始-->
47 <constructor-arg value="192.168.177.188"/>
48 <constructor-arg value="6379"/>
测试缓存效果
#redis-cli -h 192.168.177.188 -p 6379
192.168.177.188:6379> info
keyspace_hits:1 或者 keyspace_misses:2//关注这个值,命中数和未命中数
登录商城,然后反复点击需要数据库参与的操作页面,再回来检查keyspace_hits或者keyspace_misses: 值变化。
## 配置redis集群主从切换,只在主服务器上操作#redis-cli -h 192.168.177.145 info Replication //获取当前服务器的角色
#vim /etc/redis-sentinel.conf
17行 protected-mode no17G
68行 sentinel monitor mymaster 192.168.177.145 6379 1 //1表示1台从 注意:修改
98行 sentinel down-after-milliseconds mymaster 3000 //故障切换时间单位是毫秒
#service redis-sentinel start //启动集群
#netstat -anpt | grep 26379
#redis-cli -h 192.168.177.145 -p 26379 info Sentinel //查看集群信息
## Mysql主从mysql主服务器配置
#vim /etc/my.cnf //[mysqld]下
binlog-ignore-db=mysql,information_schema
character_set_server=utf8
log_bin=mysql_bin
server_id=1
log_slave_updates=true
sync_binlog=1
#systemctl restart mariadb
#netstat -anpt | grep 3306
#mysql -u root -p
show master status; //记录日志文件名称和 位置值
grant replication slave on . to ‘rep‘@‘192.168.177.%‘ identified by ‘123456‘;
flush privileges;
大型网站架构之百万PV
mysql从服务器配置
#vim /etc/my.cnf //[mysqld]下
binlog-ignore-db=mysql,information_schema
character_set_server=utf8
log_bin=mysql_bin
server_id=2
log_slave_updates=true
sync_binlog=1
#systemctl restart mariadb
#netstat -anpt | grep 3306
#mysql -u root -p
change master to master_host=‘192.168.177.145‘,master_user=‘rep‘,master_password=‘123456‘,master_log_file=‘mysql_bin.000001‘,master_log_pos=245;
start slave;
show slave status\G;
Slave_IO_Running: YesSlave_SQL_Running: Yes大型网站架构之百万PV