---恢复内容开始---
在搭建路由项目的时候的基本步骤
一:创建项目
安装好vue 搭好环境 (步骤在上篇博客中)
进入项目目录 cd 目录路径/ 目录名
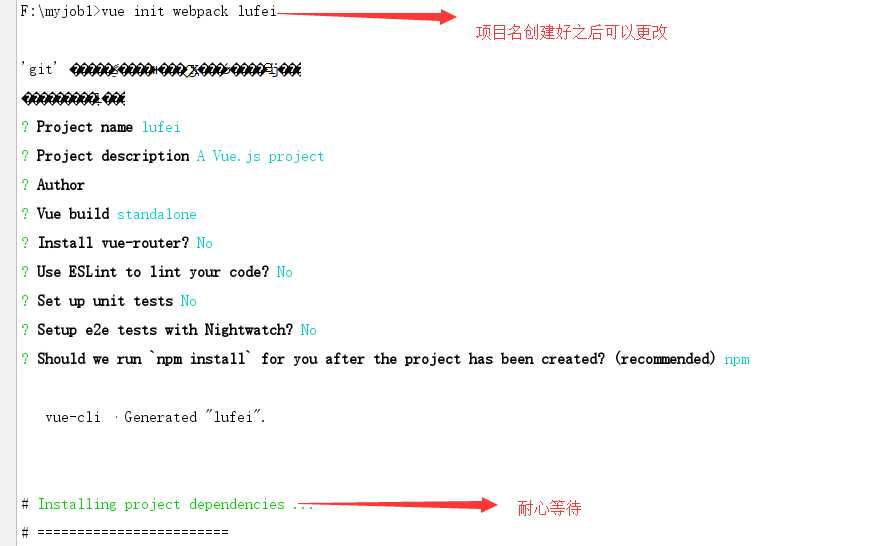
创建项目 vue init webpack 项目名
效果:
项目文件结构:及作用
-- build // 项目构建(webpack)相关代码| |-- build.js // 生产环境构建代码| |-- check-version.js // 检查node、npm等版本| |-- dev-client.js // 热重载相关| |-- dev-server.js // 构建本地服务器| |-- utils.js // 构建工具相关| |-- webpack.base.conf.js // webpack基础配置| |-- webpack.dev.conf.js // webpack开发环境配置| |-- webpack.prod.conf.js // webpack生产环境配置|-- config // 项目开发环境配置| |-- dev.env.js // 开发环境变量| |-- index.js // 项目一些配置变量| |-- prod.env.js // 生产环境变量| |-- test.env.js // 测试环境变量|-- src // 源码目录
  |--assets //里面放属于该项目的资源文件。存放其他组件的资源文件会被webpack编译,导致报错 | |-- components // vue公共组件| |-- store // vuex的状态管理| |-- App.vue // 页面入口文件| |-- main.js // 程序入口文件,加载各种公共组件|-- static // 绝对路径静态文件 任何放在在static/的文件都使用绝对的URL /static/[filename]来引用| |-- data // 群聊分析得到的数据用于数据可视化|-- .babelrc // ES6语法编译配置|-- .editorconfig // 定义代码格式|-- .gitignore // git上传需要忽略的文件格式|-- README.md // 项目说明|-- favicon.ico|-- index.html // 入口页面|-- package.json // 项目基本信息
二: 启动项目
1 进入项目目录: cd 项目名
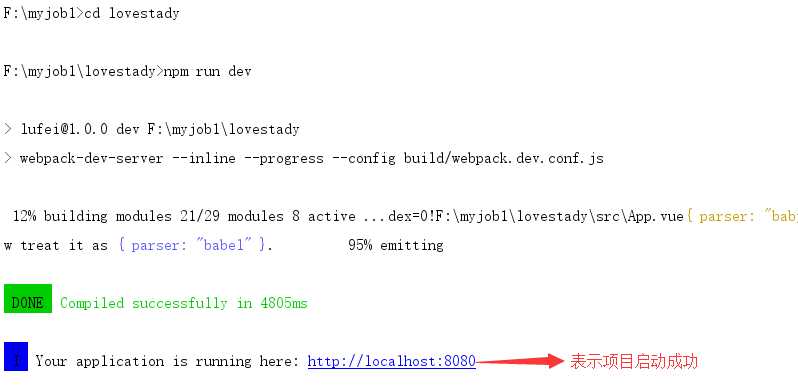
2 启动项目: npm run dev
效果:
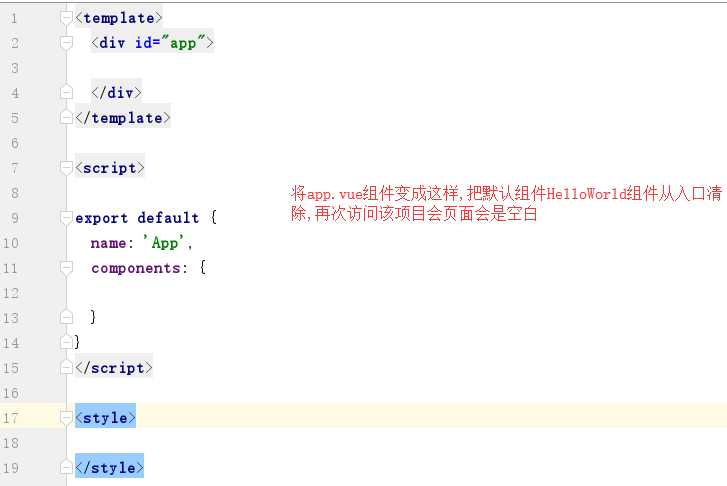
3 然后初始化组件
三: 安装配置路由
1 安装 : npm install vue-router
2 配置路由:
如图创建如有目录

3 在index.js路由文件中编写初始化路由对象的代码


import Vue from "vue"import Router from "vue-router"// 这里导入可以让让用户访问的组件Vue.use(Router);export default new Router({ // 设置路由模式为‘history’,去掉默认的# mode: "history", routes:[ // 路由列表 ]})
index.js
4 注册路由信息
打开main.js文件,把router对象注册到vue中,代码如下


// The Vue build version to load with the `import` command// (runtime-only or standalone) has been set in webpack.base.conf with an alias.import Vue from ‘vue‘import App from ‘./App‘import router from ‘./routers/index‘;Vue.config.productionTip = false/* eslint-disable no-new */new Vue({ el: ‘#app‘, router, components: { App }, template: ‘<App/>‘});
main.js
5 在视图中显示路由对应的内容
在App.vue组件中,添加显示路由对应的内容


<template> <div id="app"> <router-view/> </div></template><script>export default { name: ‘App‘, components: { }}</script><style></style>
App.vue
四: 引入ElementUl 框架


对于前端页面布局,我们可以使用一些开源的UI框架来配合开发,Vue开发前端项目中,比较常用的就是ElementUI了。ElementUI是饿了么团队开发的一个UI组件框架,这个框架提前帮我们提供了很多已经写好的通用模块,我们可以在Vue项目中引入来使用,这个框架的使用类似于我们前面学习的bootstrap框架,也就是说,我们完全可以把官方文档中的组件代码拿来就用,有定制性的内容,可以直接通过样式进行覆盖修改就可以了。ElementUI框架的描述
中文官网:http://element-cn.eleme.io/#/zh-CN
文档快速入门:http://element-cn.eleme.io/#/zh-CN/component/quickstart
1 快速安装ElementUI
安装指令:npm i element-ui -S 或 npm install element-ui --save
2 在main.js中导入ElementUI,
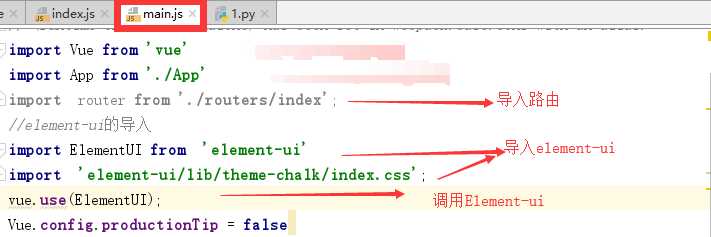


// The Vue build version to load with the `import` command// (runtime-only or standalone) has been set in webpack.base.conf with an alias.import Vue from ‘vue‘import App from ‘./App‘import router from ‘./routers/index‘;//element-ui的导入import ElementUI from ‘element-ui‘import ‘element-ui/lib/theme-chalk/index.css‘;vue.use(ElementUI);Vue.config.productionTip = false/* eslint-disable no-new */new Vue({ el: ‘#app‘, Route, components: { App }, template: ‘<App/>‘});
main.js
五: 开发页面
(一): 首页
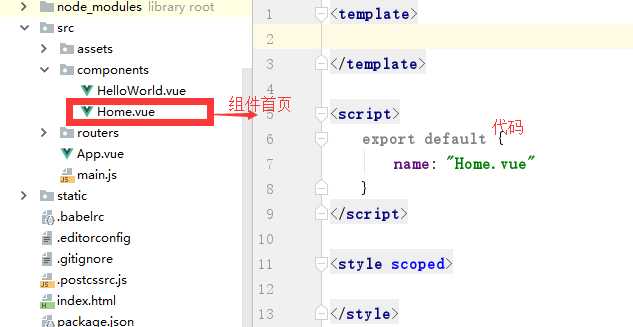
1 创建首页组件


<template></template><script> export default { name: "Home", data(){ return { }; } }</script><style scoped></style>
首页组件
2 创建首页对应的路由
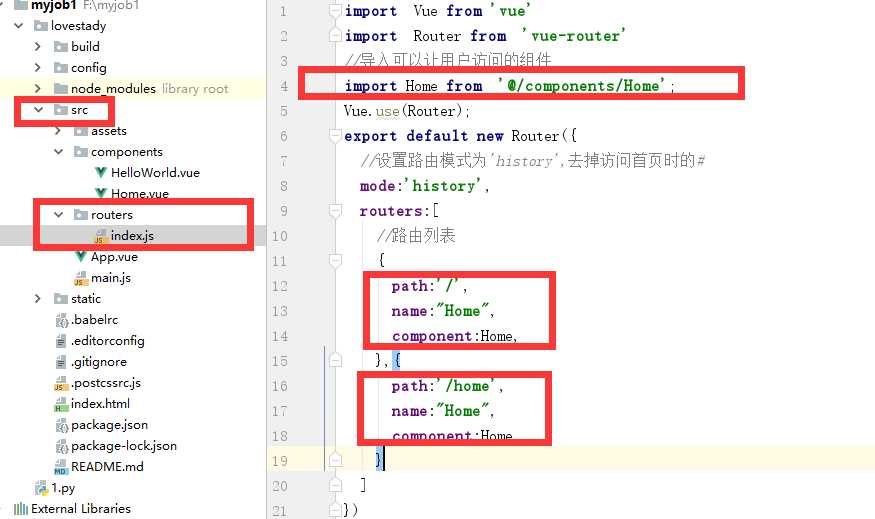
在routes/index.js中引入home组件,并设置Home组件作为路由


import Vue from "vue"import Router from "vue-router"// 这里导入可以让让用户访问的组件import Home from "@/components/Home";Vue.use(Router);export default new Router({ // 设置路由模式为‘history’,去掉默认的# mode: "history", routes:[ // 路由列表 { path: "/", name: "Home", component: Home, }, { path: "/home", name: "Home", component:Home, } ]})index.js
效果
3 开发子导航组件
在其他页面都存在相同的导航,为避免重复代码,需创建一个单独的组件
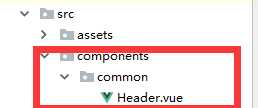
4 在首页Home.vue导入导航插件,代码如下:


<template> <div class="home"> <Header/> </div></template><script> import Header from "./common/Header" export default { name: "Home", data(){ return { }; }, components:{ Header, } }</script><style scoped></style>
home.vue
---恢复内容结束---