spring boot jpa 底层实现为hibernate,hibernate的缓存机制分为:
1 . 一级缓存(session缓存)
2. 二级缓存(id查询缓存)
3. 查询缓存
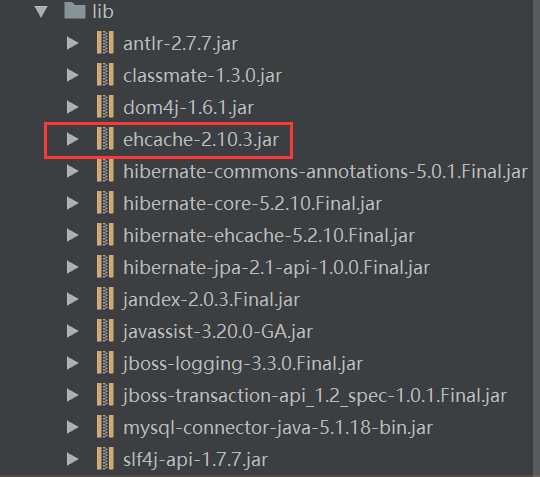
导入mybatis相关依赖 ,其中 ehcache为实现二级缓存和查询缓存需要的缓存框架。
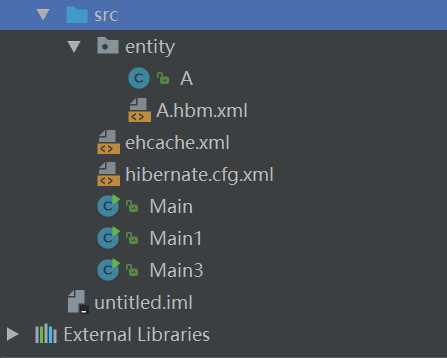
项目结构图如下:
hibernate的主配置问价如下:
 1 <?xml version=‘1.0‘ encoding=‘utf-8‘?>
 2 <!DOCTYPE hibernate-configuration PUBLIC
 3         "-//Hibernate/Hibernate Configuration DTD//EN"
 4         "http://www.hibernate.org/dtd/hibernate-configuration-3.0.dtd">
 5 <hibernate-configuration>
 6     <!-- 通常,一个session-factory节点代表一个数据库 -->
 7     <session-factory>
 8
 9         <!-- 1. 数据库连接配置 -->
10         <property name="hibernate.connection.driver_class">com.mysql.jdbc.Driver</property>
11         <property name="hibernate.connection.url">jdbc:mysql://127.0.0.1:3306/shop-db</property>
12         <property name="hibernate.connection.username">root</property>
13         <property name="hibernate.connection.password">123456</property>
14
15         <!--  数据库方法配置, hibernate在运行的时候,会根据不同的方言生成符合当前数据库语法的sql   -->
16         <property name="hibernate.dialect">org.hibernate.dialect.MySQL5Dialect</property>
17
18
19         <!-- 2. 其他相关配置 -->
20         <!-- 2.1 显示hibernate在运行时候执行的sql语句 -->
21         <property name="hibernate.show_sql">true</property>
22         <!-- 2.2 格式化sql -->
23         <property name="hibernate.format_sql">true</property>
24         <!-- 2.3 自动建表  -->
25         <property name="hibernate.hbm2ddl.auto">update</property>
26
27         <!--数据库连接池的大小-->
28         <property name="hibernate.connection.pool.size">20 </property>
29         <!--字符编码-->
30         <property name="connection.characterEncoding">utf-8 </property>
31
32
33         <!--开启二级缓存 针对id查询  -->
34         <property name="hibernate.cache.use_second_level_cache">true</property>
35         <!-- 指定使用哪一个缓存框架 -->
36         <property name="hibernate.cache.region.factory_class">org.hibernate.cache.ehcache.EhCacheRegionFactory</property>
37
38         <!-- 开启查询缓存  hibernate的查询缓存是主要是针对普通属性结果集的缓存, 而对于实体对象的结果集只缓存id。 -->
39         <property name="hibernate.cache.use_query_cache">true</property>
40
41
42
43
44         <!--3. 加载所有映射-->
45         <mapping resource="entity/A.hbm.xml"/>
46
47         <!--缓存实现的是一种方式-->
48
49         <!--<class-cache class="entity.A" usage="read-write" />-->
50
51     </session-factory>
52 </hibernate-configuration>
主配置文件中需要注意的事项:
1 mapping 标签必须位于 property 标签之后
实体的映射文件:
<?xml version="1.0"?>
<!--头文件-->
<!DOCTYPE hibernate-mapping PUBLIC
        "-//Hibernate/Hibernate Mapping DTD 3.0//EN"
        "http://www.hibernate.org/dtd/hibernate-mapping-3.0.dtd">
<!--这里的package属性写的是实体类包-->
<hibernate-mapping package="entity">
    <!--class标签中的name为实体对应的类名,table标签为创建的表名,如果不写默认就是类名首字母小写(student)-->
    <class name="A">

        <!--二级缓存实现的第二种方式-->
       <cache usage="read-write" region="sample" />
        <!--
            以下所有标签,name为对应实体中属性名,column属性可有可无,有的话表示自己定义在表中的字段名,不写的话默认与name一致(与实体中的属性名一致)
        -->
        <!--必须有的主键标签-->
        <id name="id">
            <!--主键生成策略,这里表示自增长-->
            <generator class="identity"></generator>
        </id>
        <property name="name"></property>
        <property name="address"></property>
    </class>
</hibernate-mapping>
缓存矿建的配置文件:ehcache.xml
<?xml version="1.0"?>
    <ehcache xsi:noNamespaceSchemaLocation="http://ehcache.org/ehcache.xsd"
             xmlns:xsi="http://www.w3.org/2001/XMLSchema-instance">

    <!--ehcache  在 2.4 版本之后必须添加默认的配置-->
    <defaultCache timeToIdleSeconds="200"
                  maxEntriesLocalHeap="0"
                  eternal="false"/>
    <cache timeToIdleSeconds="200"
           maxEntriesLocalHeap="0"
           eternal="false"
           name="lemonCache"/>
    <cache name="sample"
           maxElementsInMemory="1000"
           eternal="true"
           timeToIdleSeconds="0"
           timeToLiveSeconds="0"
           overflowToDisk="false" />
</ehcache>
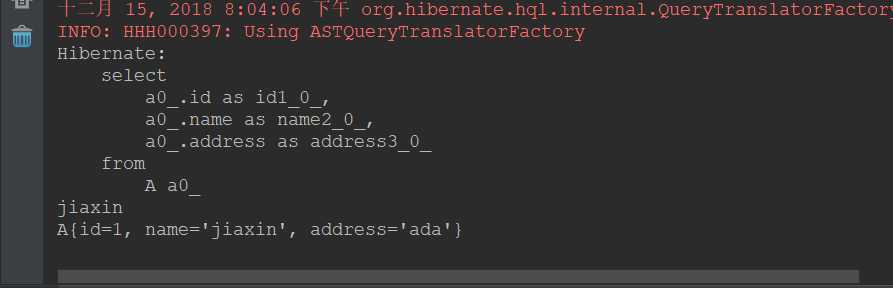
验证一级缓存:(当session不销毁时,执行相同的查询操作)

验证结果:发现执行了一次查询动作
验证二级缓存
1、在主配置文件中,开启二级缓存,同时指定实现的缓存框架
    <!--开启二级缓存 针对id查询  -->
        <property name="hibernate.cache.use_second_level_cache">true</property>
        <!-- 指定使用哪一个缓存框架 -->
        <property name="hibernate.cache.region.factory_class">org.hibernate.cache.ehcache.EhCacheRegionFactory</property>
2、增加缓存框架的配置文件:ehcache.xml
针对具体需要进行二级缓存的实体,配置缓存策略 ( usage=”read-write” )
实现方式:
1. 在主配置文件中指定需要二级缓存的实体,缓存的策略 以及具体的缓存方式
class=”entity.A” : 需要缓存的实体
usage=”read-write”:缓存读和更新
region=”sample”: 缓存框架中对用的缓存方式

2.在实体的映射文件中进行配置

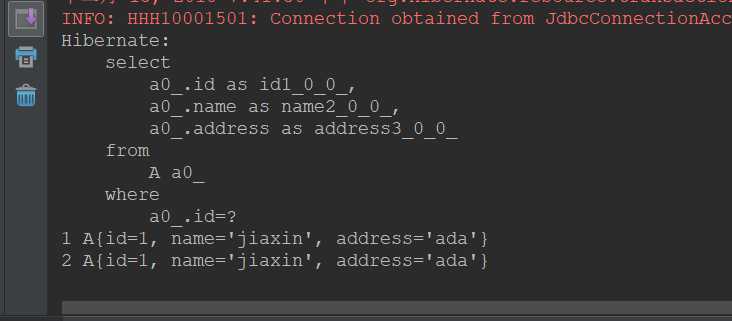
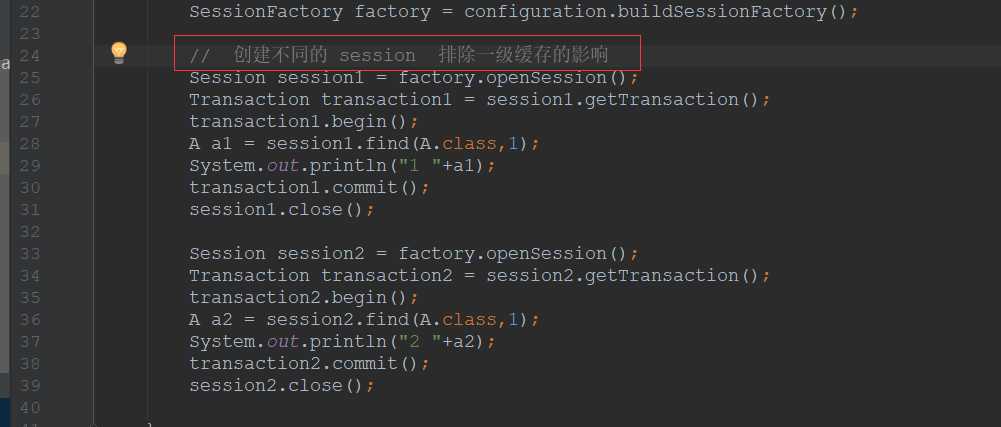
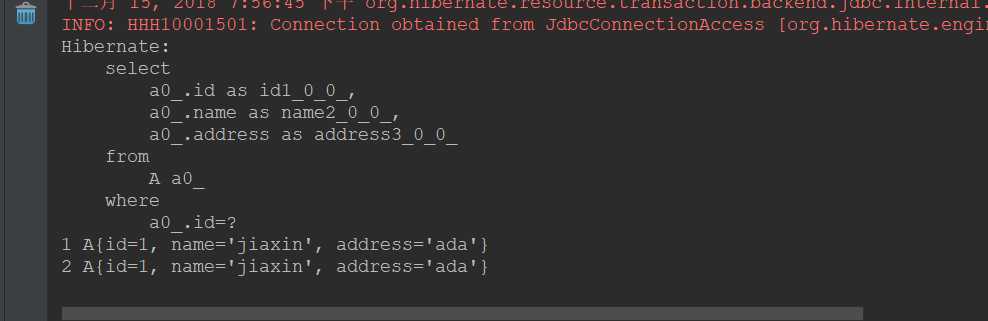
验证二级缓存:(在二级缓存开启的情况下,以不同的session去执行同一次查询,验证结果)
查询缓存,此处记录和二级缓存同时使用的情况
1.在主配置文件中开启查询缓存
<!-- 开启查询缓存  hibernate的查询缓存是主要是针对普通属性结果集的缓存, 而对于实体对象的结果集只缓存id。 -->
        <property name="hibernate.cache.use_query_cache">true</property>
2.在代码中设置开启缓存

验证结果: