补充,在前面的服务启动执行命令中,我们在package.json中的配置信息为:
 "scripts": {
    "server": "webpack-dev-server",
  },
该种方式在启动服务后还需自己访问相关url,这很不友好。此处我们新增一些配置,保证在我们启动服务后自动访问url并渲染,配置如下:
 "scripts": {
    "server": "webpack-dev-server --open",
  },
这样就实现了服务启动浏览器也会自动打开。
正文:
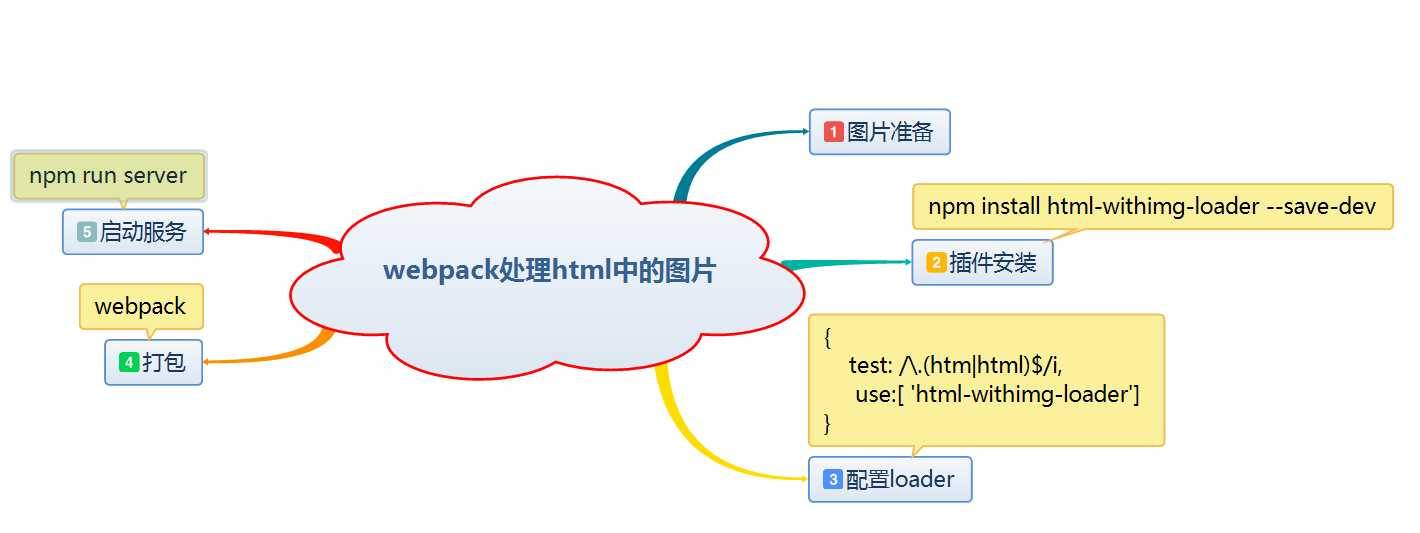
在前端开发中,我们常用img标签来引入图片,这样webpack在打包时又得做一些特殊处理,此处我们通过一个插件html-withimg-loader 来处理我们在html 中引入图片的问题。
处理html中的图片

1.新增一张图片
在src/images目录下新增一张图片,作为等会引入到html文件中图片,此处我的图片为wfbin.png。

2.引入图片
在src/index.html中引入:
<div>
    <img src="images/wfbin.png"/>
</div>
3. 插件安装
使用npm进行安装,若失败则采用cnpm进行安装。
npm install html-withimg-loader --save-dev
4.配置loader
在webpack.config.js文件中的module属性中进行配置:
{
    test: /\.(htm|html)$/i,
     use:[ ‘html-withimg-loader‘]
}
5.打包
使用webpack进行打包,我们的图片被进行了很多好的打包。

6.启动服务
运行命令npm run server命令,服务被启动,浏览器自动打开,并进行了渲染,如下:
npm run server
渲染效果:

记:到此完成了webpack打包过程中图片的相关处理。
本节源码:
index.html:


 1 <!DOCTYPE html>
 2 <html lang="en">
 3 <head>
 4     <meta charset="UTF-8">
 5     <meta name="viewport" content="width=device-width, initial-scale=1.0">
 6     <meta http-equiv="X-UA-Compatible" content="ie=edge">
 7     <title>webpack</title>
 8 </head>
 9 <body>
10 <div>
11     <img src="images/wfbin.png"/></div>
12 <div id="img"></div>
13 <div id="title"></div>
14 </body>
15 </html>
View Code
src/index.css:
body{
    background-color: #018eea;
    color: red;
    font-size: 32px;
    text-align: center;
}
#img{
    background-image: url(../images/webapck.jpg);
    width:271px;
    height:285px;
}
View Code
webpack.config.js:
const path = require(‘path‘);
const uglify = require(‘uglifyjs-webpack-plugin‘);
const htmlPlugin= require(‘html-webpack-plugin‘);
const extractTextPlugin = require("extract-text-webpack-plugin");
var website ={
    publicPath:"http://localhost:1818/"
}
module.exports={
    //入口文件的配置项
    entry:{
        entry:‘./src/entry.js‘,
        //这里我们又引入了一个入口文件
        entry2:‘./src/entry2.js‘,
    },
    //出口文件的配置项
    output:{
        //输出的路径,用了Node语法
        path:path.resolve(__dirname,‘dist‘),
        //输出的文件名称
        filename:‘[name].js‘,
        publicPath: website.publicPath
    },
    //模块:例如解读CSS,图片如何转换,压缩
    module:{
        rules: [
            {
                test: /\.css$/,
                use: extractTextPlugin.extract({
                    fallback: "style-loader",
                    use: "css-loader"
                })
            },
            {
                test:/\.(png|jpg|gif)/,
                use:[{
                    loader:‘url-loader‘,
                    options:{
                        limit:50,
                        outputPath:‘images/‘//图片打包到images下
                    }
                }
                ]
            },
            {
                test: /\.(htm|html)$/i,
                use:[ ‘html-withimg-loader‘]
            }
        ]
    },
    //插件,用于生产模版和各项功能
    plugins:[
        // new uglify(),
        new htmlPlugin({
            minify:{
                removeAttributeQuotes:true
            },
            hash:true,
            template:‘./src/index.html‘
        }),
        new extractTextPlugin("css/index.css")
    ],
    //配置webpack开发服务功能
    devServer:{
        contentBase:path.resolve(__dirname,‘dist‘), //绝对路径
        host:‘localhost‘,
        compress:true,
        port:1818
    }
}
View Code
entry.js://入口文件
import css from ‘./css/index.css‘
document.getElementById(‘title‘).innerHTML=‘Hello Webpack‘;
View Code