2020-5-9
文章编号:009/100
以前很少写文章。从今天开始我要挑战一下自己,连续输出100篇技术类文章。这100篇文章我尽量以实战案例为主。
如果你觉得本文还不错,记得关注或者给个 star,你们的赞和 star 是我编写更多更精彩文章的动力!
GitHub 地址
私人公众号:程序员小石
这里有大量的学习资料,免费分享给你
正文
上一篇文章简单分析了“奶茶店·小程序”,现在我们先来实现接口和数据库。
- 第一篇:业务逻辑拆分,敲定设计稿,设计 API 和数据库
- 第二篇:完成接口开发,测试接口
- 第三篇:完成前端页面,联调接口
本文重点内容
- Taro 构建小程序
- 云函数设计
- 云函数 + 云数据库实现:队列推送
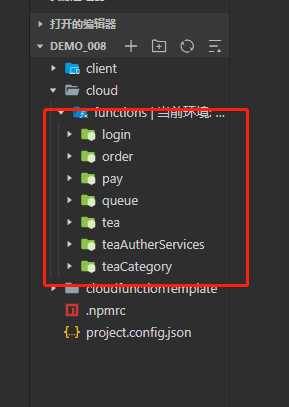
云函数

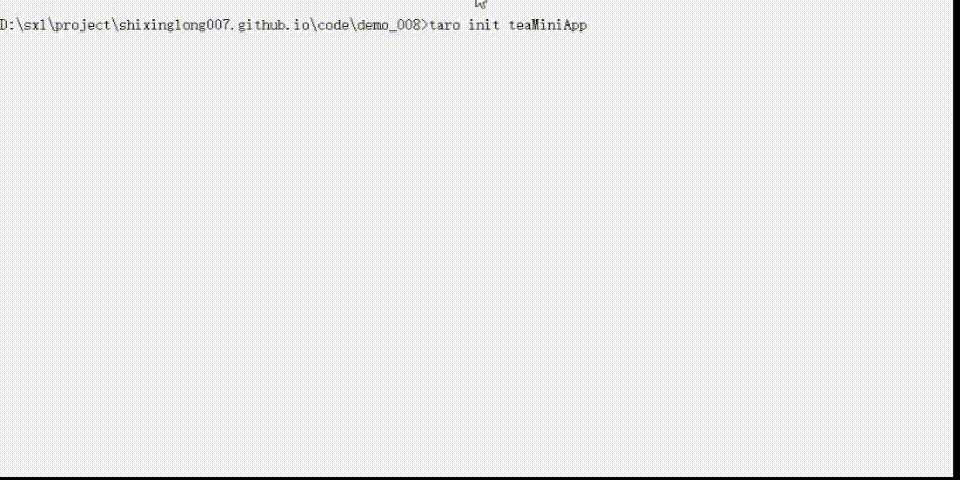
Taro 构建小程序
windows 系统要安装 python,Nodejs版本要 >=8.0.0
尽量使用Taro 最新版,微信更新的很快。Taro 也会及时跟进
我目前的Taro 版本是 v2.2.3
构建项目
云函数设计
一般一个云函数负责一个模块,比如 Tea, 只负责 Tea 的 CURD 操作。
我的云函数需要两个字段 action 和 params。
其中 action 标记动作,params 是参数。这样设计云函数能提高可扩展性。
// 云函数入口文件
const cloud = require(‘wx-server-sdk‘)
const method = require(‘./method‘);
cloud.init({ env: ‘xxx‘})

const db = cloud.database();

exports.db = db

// 云函数入口函数
exports.main = async (event, context) => {
  // 接受两个参数
  const { action, params } = event
  let res = {}
  switch(action) {
    case ‘create‘:  // 增
      res = await method.create(params);
    break;
    case ‘del‘:// 删
      res = await method.del(params);
    break;
    case ‘update‘:// 改
      res = await method.update(params);
    break;
    case ‘select‘:// 查
      res = await method.select(params);
    break;
  }
  return res
}
前端代码
// 新增
let res = await Taro.cloud.callFunction({
    name: ‘tea‘,
    data: {
        action: ‘create‘,
        params: {
            name: ‘红茶玛奇朵‘,
            price: ‘18.00‘,
            description: ‘红茶与奶油的美妙结合....‘,
            imgs: [...],
            selects: [...]
        }
    }
})
// 删除
let res = await Taro.cloud.callFunction({
    name: ‘tea‘,
    data: {
        action: ‘del‘,
        params: {
            ‘_id‘: ‘xxx‘
        }
    }
})
这样实现代码可读性强,容易扩展。
其他的云函数我就不一一列举了,大部分都是增删改查的操作。 代码传送门
云函数 + 云数据库实现:队列推送
排队功能是刚需,必须要求实时更新。云开发实现实时排队功能需要三方配合
- 数据库
- 云函数
- 前端监听(调用数据库的 .watch 功能)
数据库设计
把整个队伍整理到一条数据中,每次执行修改操作。这样会降低复杂度
// collection:Queue
// 表结构,描述某一天的排队情况
{
  _id: "",
  createDate: "2020-5-10", // 以天为key
  list: [
    { // 每一个排队的人
      beforeIndex: 0,
      createTime: Sun May 10 2020 15:04:29 GMT+0800 (中国标准时间),
      user,
      order,
      ...
    },
    {
      beforeIndex: 1,
      createTime: Sun May 10 2020 15:04:29 GMT+0800 (中国标准时间)
      user,
      order,
      ...
    },
    {
      beforeIndex: 2,
      createTime: Sun May 10 2020 15:04:29 GMT+0800 (中国标准时间)
      user,
      order,
      ...
    },
  ]
}
云函数设计
队列分为两个动作,入队 enqueue,出队 dequeue。
入队时要区分当天是否有队列,没有队列则新增一条数据。有则修改此条数据
入队过程:
锁队列 -> 查询今天的队列,如果没有则初始化队列 -> 入队 -> 同步到数据库 -> 解锁队列
出队过程:
锁队列 -> 查到队列 -> 出队 -> 同步到数据库 -> 解锁队列
由于nodejs是单线程的,我们可以在函数的外部实现一个简单的队列锁
// 队列锁
const queueLock = () => {
    let lock = true
    return {
        get: () => lock,
        set: (v) => {
            lock = v ? true : false
        }
    }
}

const lockFn = queueLock()
lockFn.get()      // 队列状态
lockFn.set(false) // 锁定队列
lockFn.set(true)  // 解锁队列
// enqueue  入队操作
const enqueue = async (params) => {
    let res = {
        success: true,
        errorCode: ‘-1‘,
        msg: ‘‘,
        data: null
    }
    try {
        while(1) {
          if (lockFn.get() === true) {
            // 1. 入队时, 加锁队列
            lockFn.set(false)
            let queue = null
            let date = moment().format(‘YYYY-M-D‘)
            let res = await main.db.collection(collName).where({ currentDate: date }) .get()
            if (res.data.length === 0) {
                // 新增队列
                queue = QueueFn(date)
            } else {
                // 入队
                queue = res.data[0];
            }
            params.beforeIndex = queue.list.length; // 等位人数
            params.createTime = new Date();
            queue.list.push(params);
            if (queue._id) {
                let newQueue = { ...queue }
                delete newQueue[‘_id‘];
                await main.db.collection(collName)
                    .doc(queue._id)
                    .set({ data: { ...newQueue } })
            } else {
                await main.db.collection(collName).add({ data: queue })
            }
            lockFn.set(true);
            break;
          }
          // 轮询减速
          await sleep(150)
        }
    } catch (error) {
        res.msg = error
        res.errorCode = ‘1010‘
        res.msg = error
        lockFn.set(true)
    }
    return res
}

// dequeue 出队操作
const dequeue = async (params) => {
    let res = {
        success: true,
        errorCode: ‘-1‘,
        msg: ‘‘,
        data: null
    }
    try {
        while(1) {
            if (lockFn.get() === true) {
              // 锁队列
              lockFn.set(false)
              let queue = {}
              // 出队
              let date = moment().format(‘YYYY-M-D‘)
              let res = await main.db.collection(collName).where({ currentDate: date }) .get()
              if (res.data.length > 0) {
                  queue = res.data[0]
                  queue.list.shift()
                  // 重置 beforeIndex
                  queue.list = queue.list.map((item, i) => {
                      item.beforeIndex = i
                      return item
                  })
              }
              let newQueue = {...queue}
              delete newQueue[‘_id‘]
              await main.db.collection(collName)
                      .doc(queue._id)
                      .set({ data: { ...newQueue  } })
              lockFn.set(true)
              break;
            }
        }
    } catch (error) {
        res.msg = error
        res.errorCode = ‘1010‘
        res.msg = error
    }
    return res
}
小程序端代码
const db = wx.cloud.database()
// 队列监听
watcher = db.collection(‘Queue‘)
  .orderBy(‘currentDate‘, ‘asc‘)
  .where({
    currentDate: moment().format(‘YYYY-M-D‘)
  })
  .limit(1)
  .watch({
    onChange: function(snapshot) {
      console.log(‘完整队列‘, snapshot.docs)
    },
    onError: function(err) {
      console.error(‘the watch closed because of error‘, err)
    }
  })
所有的云函数代码,在这里 -> GitHub
最后
- 想加入我的前端小群的同学,我微信:guzhan321,备注 群
- 喜欢这篇文章的话,请把他分享给有帮助的人
- 有写错的或者你不认同的地方,请通过微信告诉我,谢谢
下一篇文章:完成前端页面,联调接口