文章系列目录
- Wechat development series 1 – setup your development environment
- Wechat development series 2 – development Q&A service using nodejs
- Wechat development series 3 – Trigger C4C Account creation in Wechat app
- Wechat development series 4 – Send C4C Data change notification to Wechat app
- Wechat development series 5 – embedded your UI5 application to Wechat app
- Wechat development series 6 – Retrieve Wechat User info via oAuth2 and display it in UI5 application
- Wechat development series 7 – use Redis to store Wechat conversation history
- Wechat development series 8 – Map integration
- Wechat development series 9 – Create C4C Social Media Message and Service within Wechat app
- Wechat development series 10 – Use Wechat app to receive Service Request reply made from C4C
Tencent’s WeChat, a social networking app with more than 760 million monthly active users, is becoming a dominant mobile channel connecting businesses and customers. This series will illustrate how to do some development on Wechat so it could interact with SAP product like SAP Cloud for Customer.
Prerequisite
(1) You should have already registered an subscription account in Wechat Official Account platform: https://mp.weixin.qq.com
(2) You should have basic knoledge about nodejs development.
Detail steps for environment setup
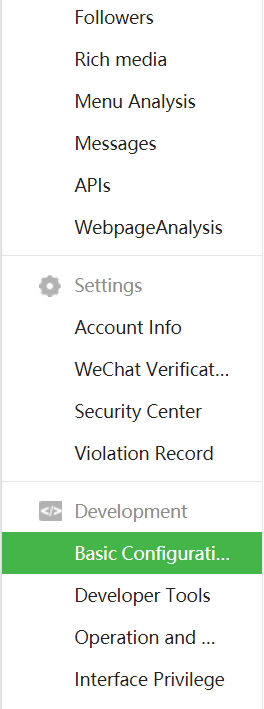
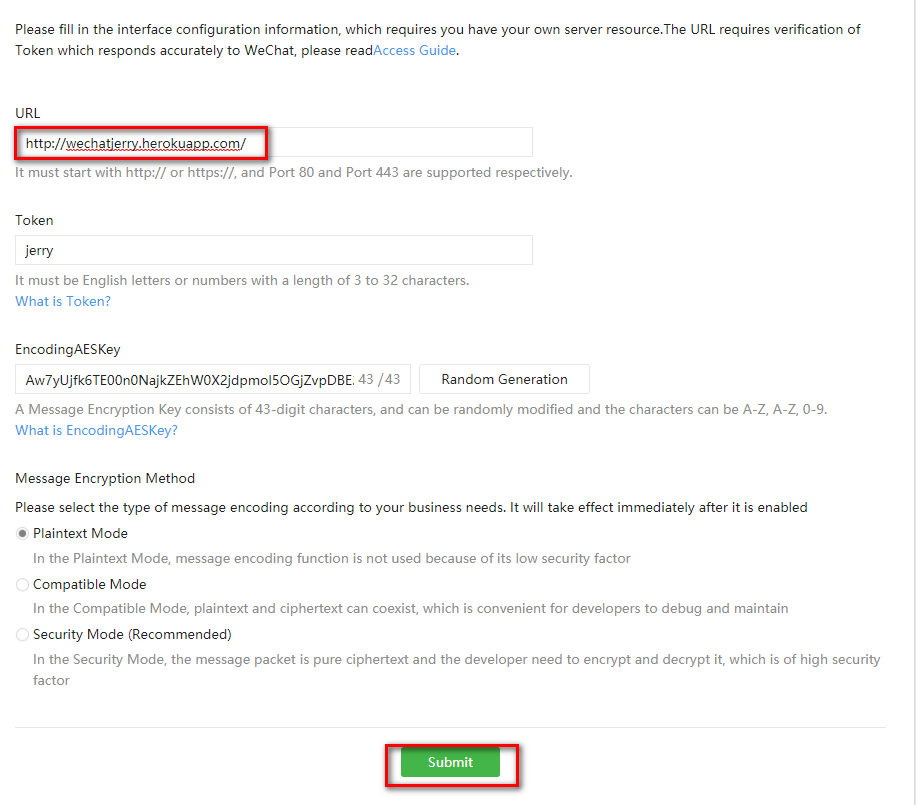
Log on to Official Account platform https://mp.weixin.qq.com, menu Development->Basic configuration,
The most important setting here is the server url, where the custom logic of your Wechat official subscription account is hosted.

In this series, I will use nodejs plus Heroku to host the server. This server is responsible to serve the request which is delegated by Wechat platform issued originally by your Wechat official subscription account’s followers. Before Wechat platform will really delegate user request to this server, you must first pass the verification defined by Wechat’s development guide: https://mp.weixin.qq.com/wiki?t=resource/res_main&id=mp1472017492_58YV5
Unfortunately the verification flow chart in the guide is drawn with Chinese text:
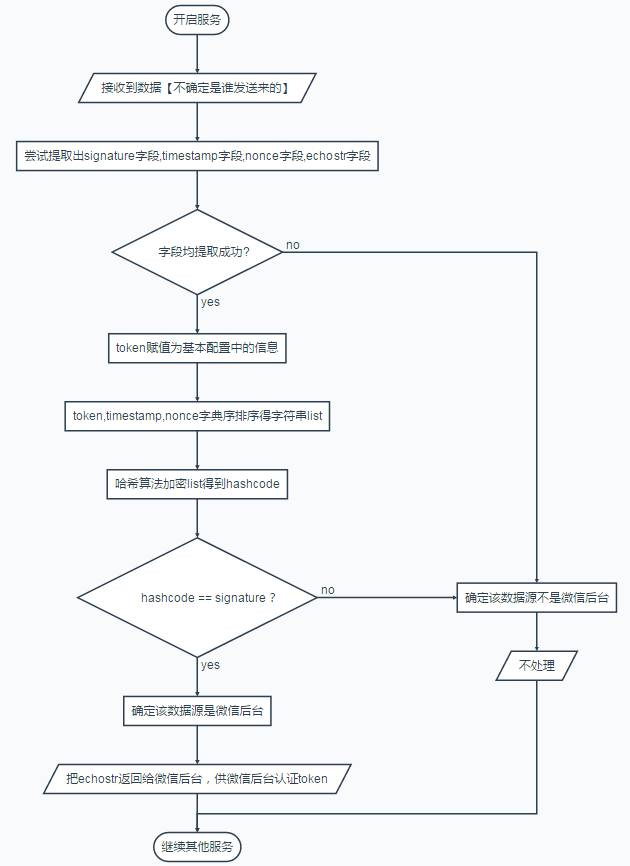
And the provided sample code is written by Python, so here I will provide a nodejs solution instead.
As long as you press “Submit” button, Wechat platform will send a http request to the server specified via this URL:
The http request looks like below:
https://
/?signature=096abd439b41f9610aeabe2d7534084fd8dafa20&echostr=16168327802220428137×tamp=1512810825&nonce=384289189
The responsibility of your server is then to calculate a result based on your subscription account token, the timestamp and the nonce field, and compare it with the echostr passed with the request url. If the comparison result is not equal, you will see error message “Token authentication failed”.

Only after your server has passed the verification then it is ready for subsequent development.
Below is the step how to develop your server to pass the verification.
(1) Create a new nodejs project with the following package.json. The highlighted part is relevant for server verification.
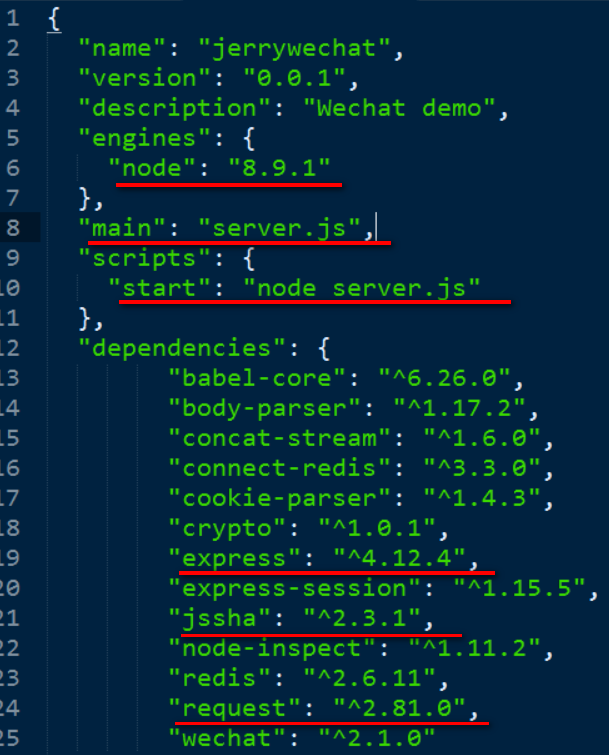
(2) Implement server.js with following source code:
var express = require(‘express‘);
var routesEngine = require(‘./index.js‘);
var app = express();
routesEngine(app);

app.listen(process.env.PORT || 3000, function () {
  console.log(‘Listening on port, process.cwd(): ‘ + process.cwd() );
});
In implementation of index.js, now we need to implement verification process:
var request = require(‘request‘);
var jsSHA = require(‘jssha‘);

module.exports = function (app) {
  app.route(‘/‘).get(function(req,res){
    var token="jerry"; // replace it with your own token
    var signature = req.query.signature,
      timestamp = req.query.timestamp,
      echostr   = req.query.echostr,
      nonce     = req.query.nonce;
      oriArray = new Array();
      oriArray[0] = nonce;
      oriArray[1] = timestamp;
      oriArray[2] = token;
      oriArray.sort();
      var original = oriArray.join(‘‘);

      var shaObj = new jsSHA("SHA-1", ‘TEXT‘);
      shaObj.update(original);
      var scyptoString = shaObj.getHash(‘HEX‘);
      console.log("calculated string: " + scyptoString);
     if (signature == scyptoString) {
        res.send(echostr);
     } else {
        res.send(‘bad token‘);
     }
  });
};
(3) deploy this nodejs application to Heroku. For detail steps, please refer to my blog Step by step to host your UI5 application in Heroku.
Once done, perform the verification in Wechat Official Account platform.
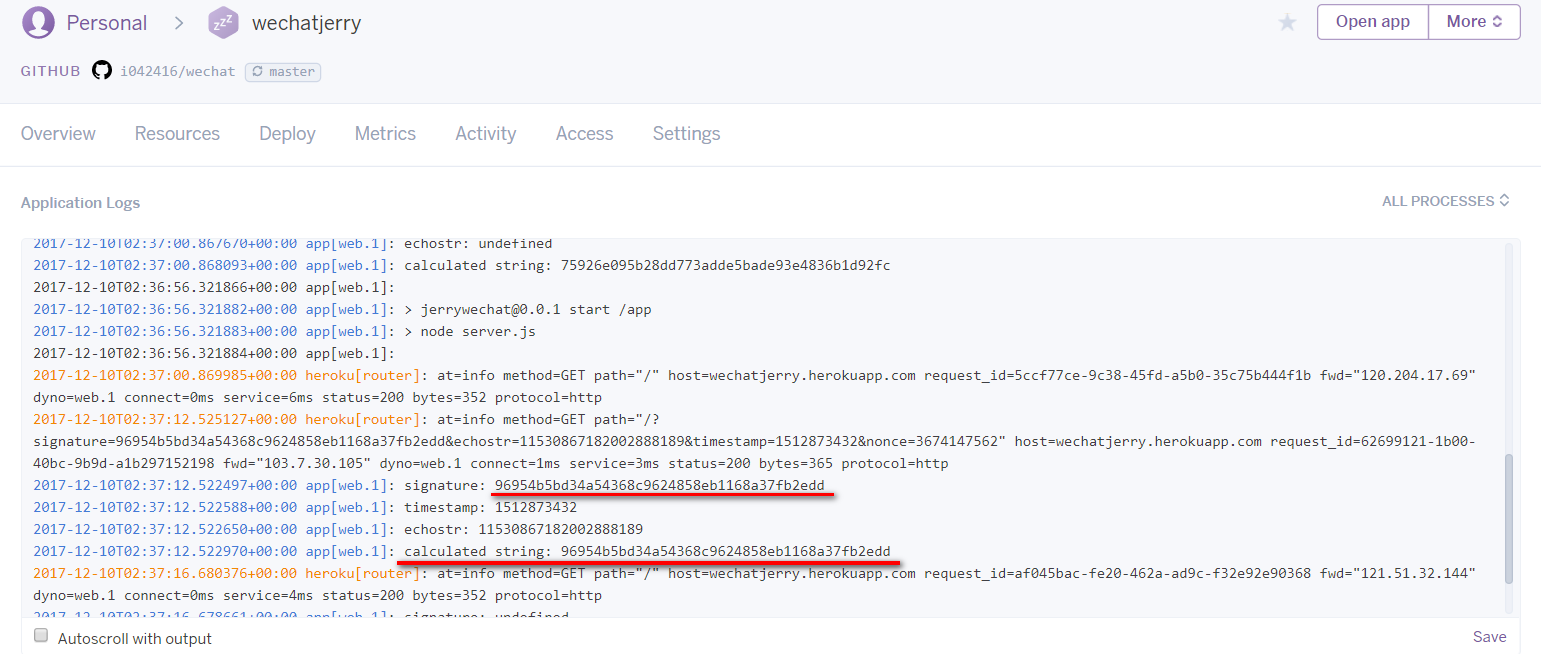
Then in Heroku application console we can see that the signature passed from Wechat platform is equal to the value calculated in our nodejs server, as a result the verification is finished successfully:
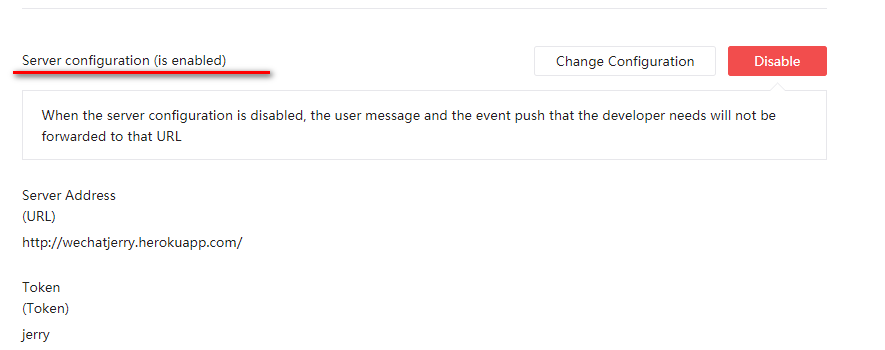
You can see now the Server configuration in Wechat platform is marked as enabled, which is ready for subsequent development.
要获取更多Jerry的原创文章,请关注公众号”汪子熙”: