自定义菜单这个功能在我们普通的编辑模式下是可以直接在后台编辑的,但是一旦我们进入开发模式之后我们的自定义菜单就需要自己用代码实现,所以对于刚开始接触的人来说可能存在一定的疑惑,这里我说下平时我们在开发模式下常用的两种自定义菜单的实现方式:①不用写实现代码,直接用网页测试工具Post json字符串生成菜单;②就是在我们的开发中用代码实现菜单生成!(参考文档:http://mp.weixin.qq.com/wiki/10/0234e39a2025342c17a7d23595c6b40a.html )在自定义菜单中菜单的类型分为两种,一种为view的视图菜单,点击之后直接跳转到url页面;还有一种是click类型的点击型,后端通过点击事件类型给与不同的相应;后面新增了各种特色功能的菜单其本质都还是Click类型的菜单,所以生成的规则都是一样的,其生成菜单的方式都是向微信服务器post json字符串生成菜单,下面讲述菜单生成的方法和规则!(参考文档:http://mp.weixin.qq.com/wiki/10/0234e39a2025342c17a7d23595c6b40a.html )在自定义菜单中菜单的类型分为两种,一种为view的视图菜单,点击之后直接跳转到url页面;还有一种是click类型的点击型,后端通过点击事件类型给与不同的相应;后面新增了各种特色功能的菜单其本质都还是Click类型的菜单,所以生成的规则都是一样的,其生成菜单的方式都是向微信服务器post json字符串生成菜单,下面讲述菜单生成的方法和规则!
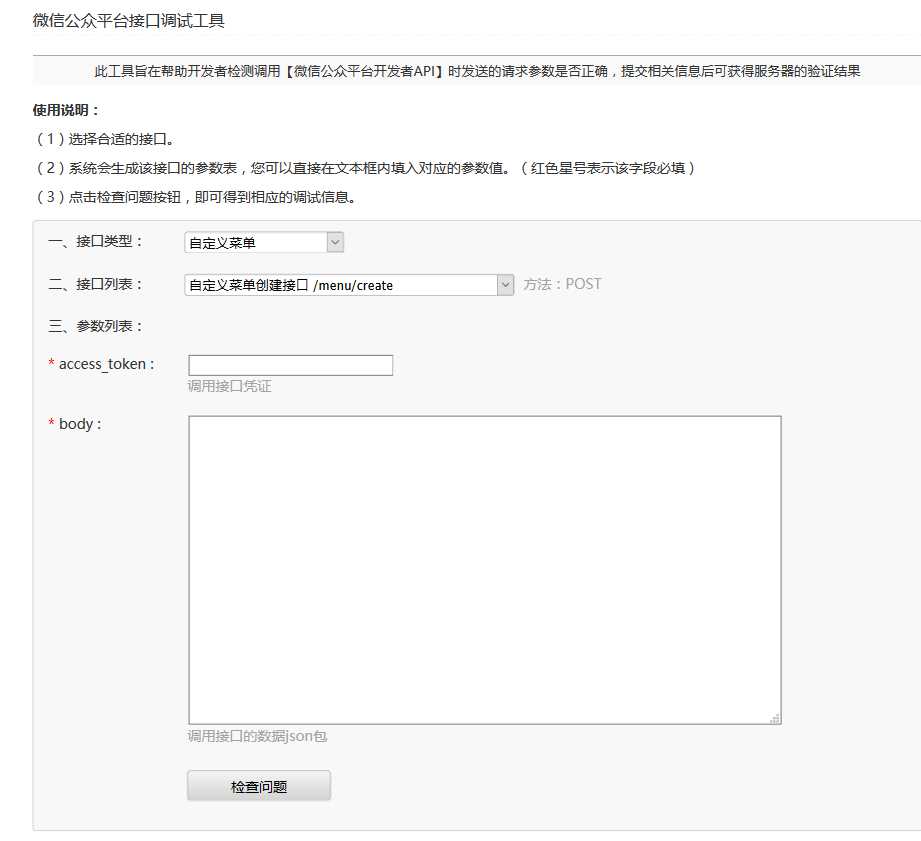
我们通过连接(https://mp.weixin.qq.com/debug/cgi-bin/apiinfo?t=index&type=%E8%87%AA%E5%AE%9A%E4%B9%89%E8%8F%9C%E5%8D%95&form=%E8%87%AA%E5%AE%9A%E4%B9%89%E8%8F%9C%E5%8D%95%E5%88%9B%E5%BB%BA%E6%8E%A5%E5%8F%A3%20/menu/create )进入到网页调试工具,如下图:

在这里我们生成菜单的时候只需要我们账号的有效token和json字符串即可,这里的json字符串可以参照文档中的案例做出修改得到,我这里给出的一个案例如下:
1 { 2 "button": [ 3 { 4 "name": "博客", 5 "type": "view", 6 "url": "https://www.cnblogs.com/gede" 7 }, 8 { 9 "name": "菜单", 10 "sub_button": [11 {12 "key": "text", 13 "name": "回复图文", 14 "type": "click"15 }, 16 {17 "name": "博客", 18 "type": "view", 19 "url": "https://www.cnblogs.com/gede"20 }21 ]22 }, 23 {24 "key": "text", 25 "name": "回复图文", 26 "type": "click"27 }28 ]29 }
我们填入响应的token,点击检查问题如果返回结果Ok就可以了。到这里我们采用web测试工具生成菜单的方式就完成了,下面接着介绍用代码生成菜单!
前面我们有说道在菜单中有view和click两种类型的事件,这里我们首先在代码中建立两种类型对应的java实体,view类型建立实体ViewButton.java如下:
1 package com.gede.wechat.menu; 2 /** 3 * @author gede 4 * @version date:2019年5月28日 下午7:02:43 5 * @description : 6 */ 7 public class ViewButton { 8 private String type; 9 private String name;10 private String url;11 12 public String getType() {13 return type;14 }15 16 public void setType(String type) {17 this.type = type;18 }19 20 public String getName() {21 return name;22 }23 24 public void setName(String name) {25 this.name = name;26 }27 28 public String getUrl() {29 return url;30 }31 32 public void setUrl(String url) {33 this.url = url;34 }35 36 }
同样的建立click的实体ClickButton.java如下:
1 package com.gede.wechat.menu; 2 /** 3 * @author gede 4 * @version date:2019年5月28日 下午7:03:02 5 * @description : 6 */ 7 public class ClickButton { 8 private String type; 9 private String name;10 private String key;11 12 public String getType() {13 return type;14 }15 16 public void setType(String type) {17 this.type = type;18 }19 20 public String getName() {21 return name;22 }23 24 public void setName(String name) {25 this.name = name;26 }27 28 public String getKey() {29 return key;30 }31 32 public void setKey(String key) {33 this.key = key;34 }35 36 }
这里创建两个实体也是为了方便我们在自定义菜单中对json的封装,在这里我用代码的形式封装了上面给出的同样的json格式,并调用生成自定义菜单的接口发送到微信服务器,简单代码如下:
1 package com.gede.wechat.menu; 2 import org.springframework.stereotype.Component; 3 4 import com.alibaba.fastjson.JSONObject; 5 import net.sf.json.JSONArray; 6 7 import com.gede.web.util.GlobalConstants; 8 import com.gede.wechat.util.HttpUtils; 9 10 /**11 * @author gede12 * @version date:2019年5月28日 下午7:03:2413 * @description :14 */15 @Component16 public class MenuMain {17 18 public void createMenu(){19 ClickButton cbt=new ClickButton();20 cbt.setKey("image");21 cbt.setName("回复图片");22 cbt.setType("click");23 24 25 ViewButton vbt=new ViewButton();26 vbt.setUrl("https://www.cnblogs.com/gede");27 vbt.setName("博客");28 vbt.setType("view");29 30 JSONArray sub_button=new JSONArray();31 sub_button.add(cbt);32 sub_button.add(vbt);33 34 35 JSONObject buttonOne=new JSONObject();36 buttonOne.put("name", "菜单");37 buttonOne.put("sub_button", sub_button);38 39 JSONArray button=new JSONArray();40 button.add(vbt);41 button.add(buttonOne);42 button.add(cbt);43 44 JSONObject menujson=new JSONObject();45 menujson.put("button", button);46 System.out.println(menujson);47 48 //这里为请求接口的url +号后面的是token,这里就不做过多对token获取的方法解释49 String url="https://api.weixin.qq.com/cgi-bin/menu/create?access_token="+GlobalConstants.getInterfaceUrl("access_token");50 51 try{52 String rs=HttpUtils.sendPostBuffer(url, menujson.toJSONString());53 System.out.println(rs);54 }catch(Exception e){55 System.out.println("请求错误!");56 }57 }58 }
这里面加了@Component组件,可以被扫为spring 的一个bean自动装配。我们在写一个简单的jsp实现响应这里的createMenue方法。
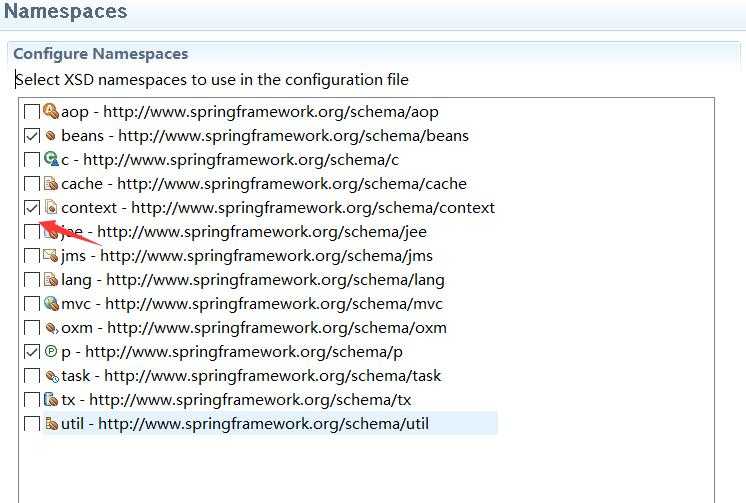
添加了Component组件扫描后,我们在applicationContext.xml中添加组件扫描包 :<context:component-scan base-package="com.gede.wechat.menu"></context:component-scan>
如果配置文件提示报错,我们添加content上下文:点开NameSpaces 如下图:

写到这里,我们就差控制器来调用我们的createMenue方法了。我们创建MenueController类,简单代码如下:
1 package com.gede.wechat.controller; 2 3 import static org.springframework.web.bind.annotation.RequestMethod.GET; 4 5 import java.io.PrintWriter; 6 7 import javax.servlet.http.HttpServletRequest; 8 import javax.servlet.http.HttpServletResponse; 9 10 import org.springframework.beans.factory.annotation.Autowired;11 import org.springframework.stereotype.Controller;12 import org.springframework.web.bind.annotation.RequestMapping;13 import org.springframework.web.bind.annotation.RequestMethod;14 import org.springframework.web.bind.annotation.RequestParam;15 16 import com.gede.wechat.menu.MenuMain;17 import com.gede.wechat.util.SignUtil;18 19 /**20 * @author gede21 * @version date:2019年5月28日 下午7:20:0822 * @description :23 */24 @Controller25 @RequestMapping("/menue")26 public class MenueController {27 28 private MenuMain menue;29 @Autowired30 public MenueController(MenuMain menue) {31 super();32 this.menue = menue;33 }34 35 @RequestMapping(value="/",method=GET)36 public String home(){37 menue.createMenu();3839 }40 41 }
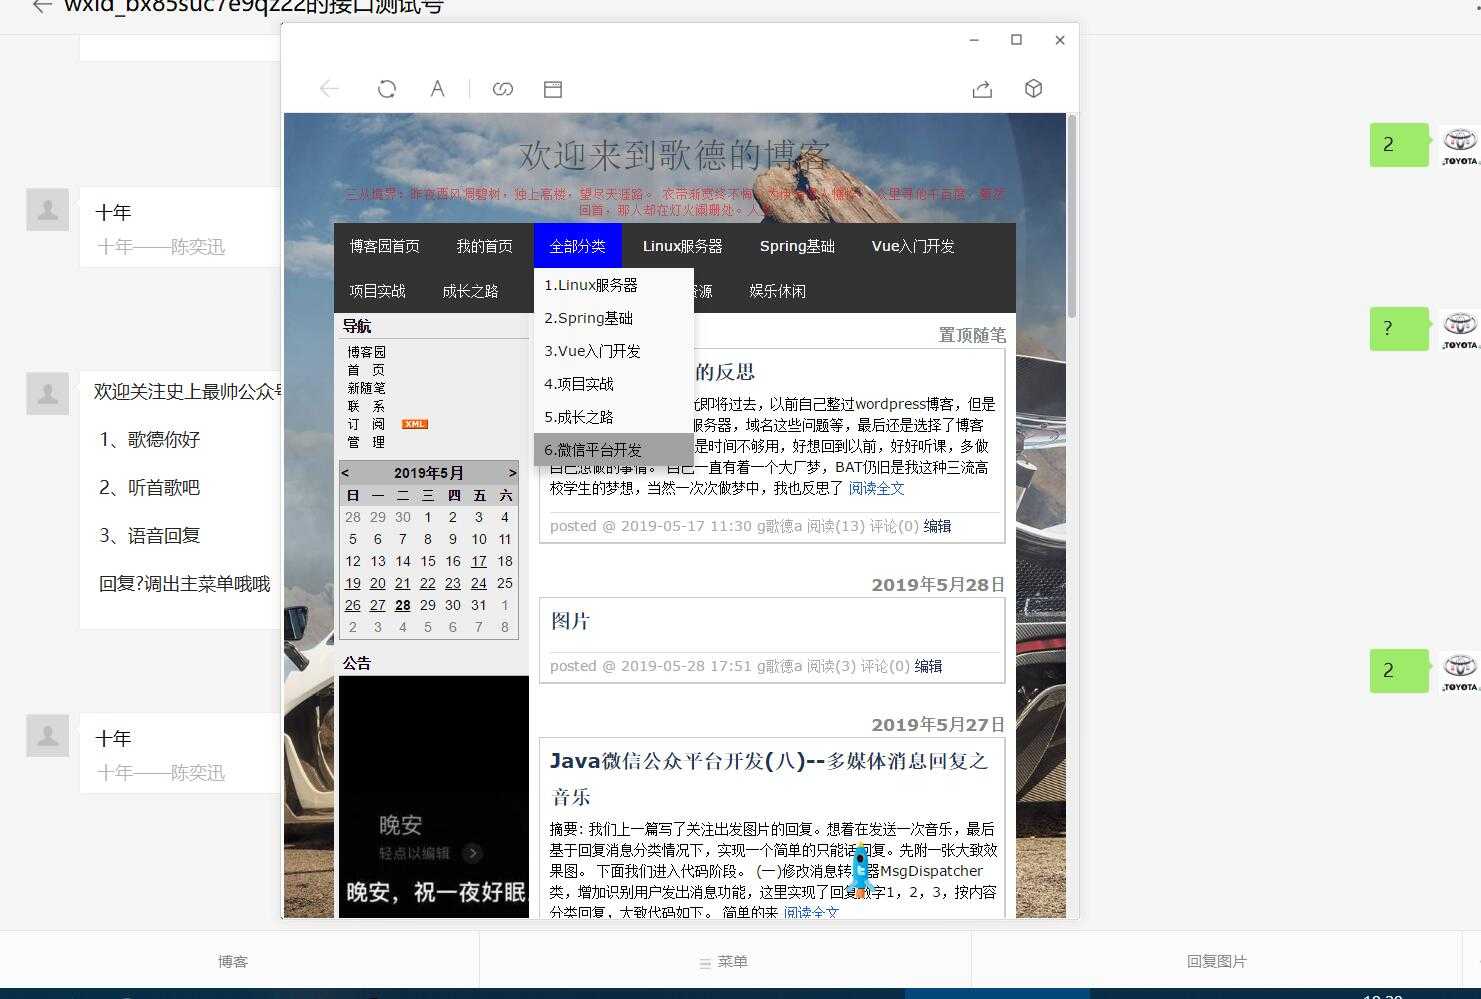
现在运行我们的项目,项目跑起来后,在浏览器地址栏输入:.自己的服务器地址./mychat/menue/create/ 。返回控制台,查看,效果如下:

再来看微信端的效果:

关于文中涉及到的Spring相关知识,大家可以去看我关于Spring的博客。有不懂的也可以留言。