一.说明
前文介绍了基于安卓客户端的开发,在此基础上,进行少许改动即可开发出一款基于TCP的安卓服务器,理论知识请参见笔者上一篇博文,下面直接实践操作。
二.权限申明
 1     <!--允许应用程序改变网络状态-->
 2     <uses-permission android:name="android.permission.CHANGE_NETWORK_STATE"/>
 3
 4     <!--允许应用程序改变WIFI连接状态-->
 5     <uses-permission android:name="android.permission.CHANGE_WIFI_STATE"/>
 6
 7
 8     <!--允许应用程序访问有关的网络信息-->
 9     <uses-permission android:name="android.permission.ACCESS_NETWORK_STATE"/>
10
11     <!--允许应用程序访问WIFI网卡的网络信息-->
12     <uses-permission android:name="android.permission.ACCESS_WIFI_STATE"/>
13
14     <!--允许应用程序完全使用网络-->
15     <uses-permission android:name="android.permission.INTERNET"/>
三.布局文件
 1 <?xml version="1.0" encoding="utf-8"?>
 2 <LinearLayout xmlns:android="http://schemas.android.com/apk/res/android"
 3     android:orientation="vertical" android:layout_width="match_parent"
 4     android:layout_height="match_parent">
 5     <LinearLayout
 6         android:layout_width="match_parent"
 7         android:layout_height="wrap_content"
 8         android:layout_marginLeft="10dp"
 9         android:layout_marginRight="10dp"
10         android:layout_marginTop="10dp"
11         android:layout_marginBottom="10dp">
12     <TextView
13         android:id="@+id/LocalIPTextView"
14         android:layout_width="match_parent"
15         android:layout_height="wrap_content"
16         android:hint="本机IP:"
17         android:textSize="25dp"/>
18     </LinearLayout>
19     <LinearLayout
20         android:layout_width="match_parent"
21         android:layout_height="wrap_content"
22         android:layout_marginLeft="10dp"
23         android:layout_marginRight="10dp"
24         android:layout_marginBottom="10dp">
25         >
26         <EditText
27             android:id="@+id/MessagetoSendEditText"
28             android:layout_width="0dp"
29             android:layout_height="match_parent"
30             android:layout_weight="3"
31             android:text="Data from Server"/>
32         <Button
33             android:id="@+id/SendButton"
34             android:layout_width="0dp"
35             android:layout_height="wrap_content"
36             android:layout_weight="1"
37             android:text="发送"/>
38     </LinearLayout>
39
40     <LinearLayout
41         android:layout_width="match_parent"
42         android:layout_height="wrap_content"
43         android:layout_marginLeft="10dp"
44         android:layout_marginRight="10dp"
45
46         android:layout_marginBottom="10dp">
47         <TextView
48             android:id="@+id/DisplayTextView"
49             android:layout_width="match_parent"
50             android:layout_height="wrap_content"
51             android:textSize="25dp"/>
52     </LinearLayout>
53
54
55 </LinearLayout>
四.具体实现代码
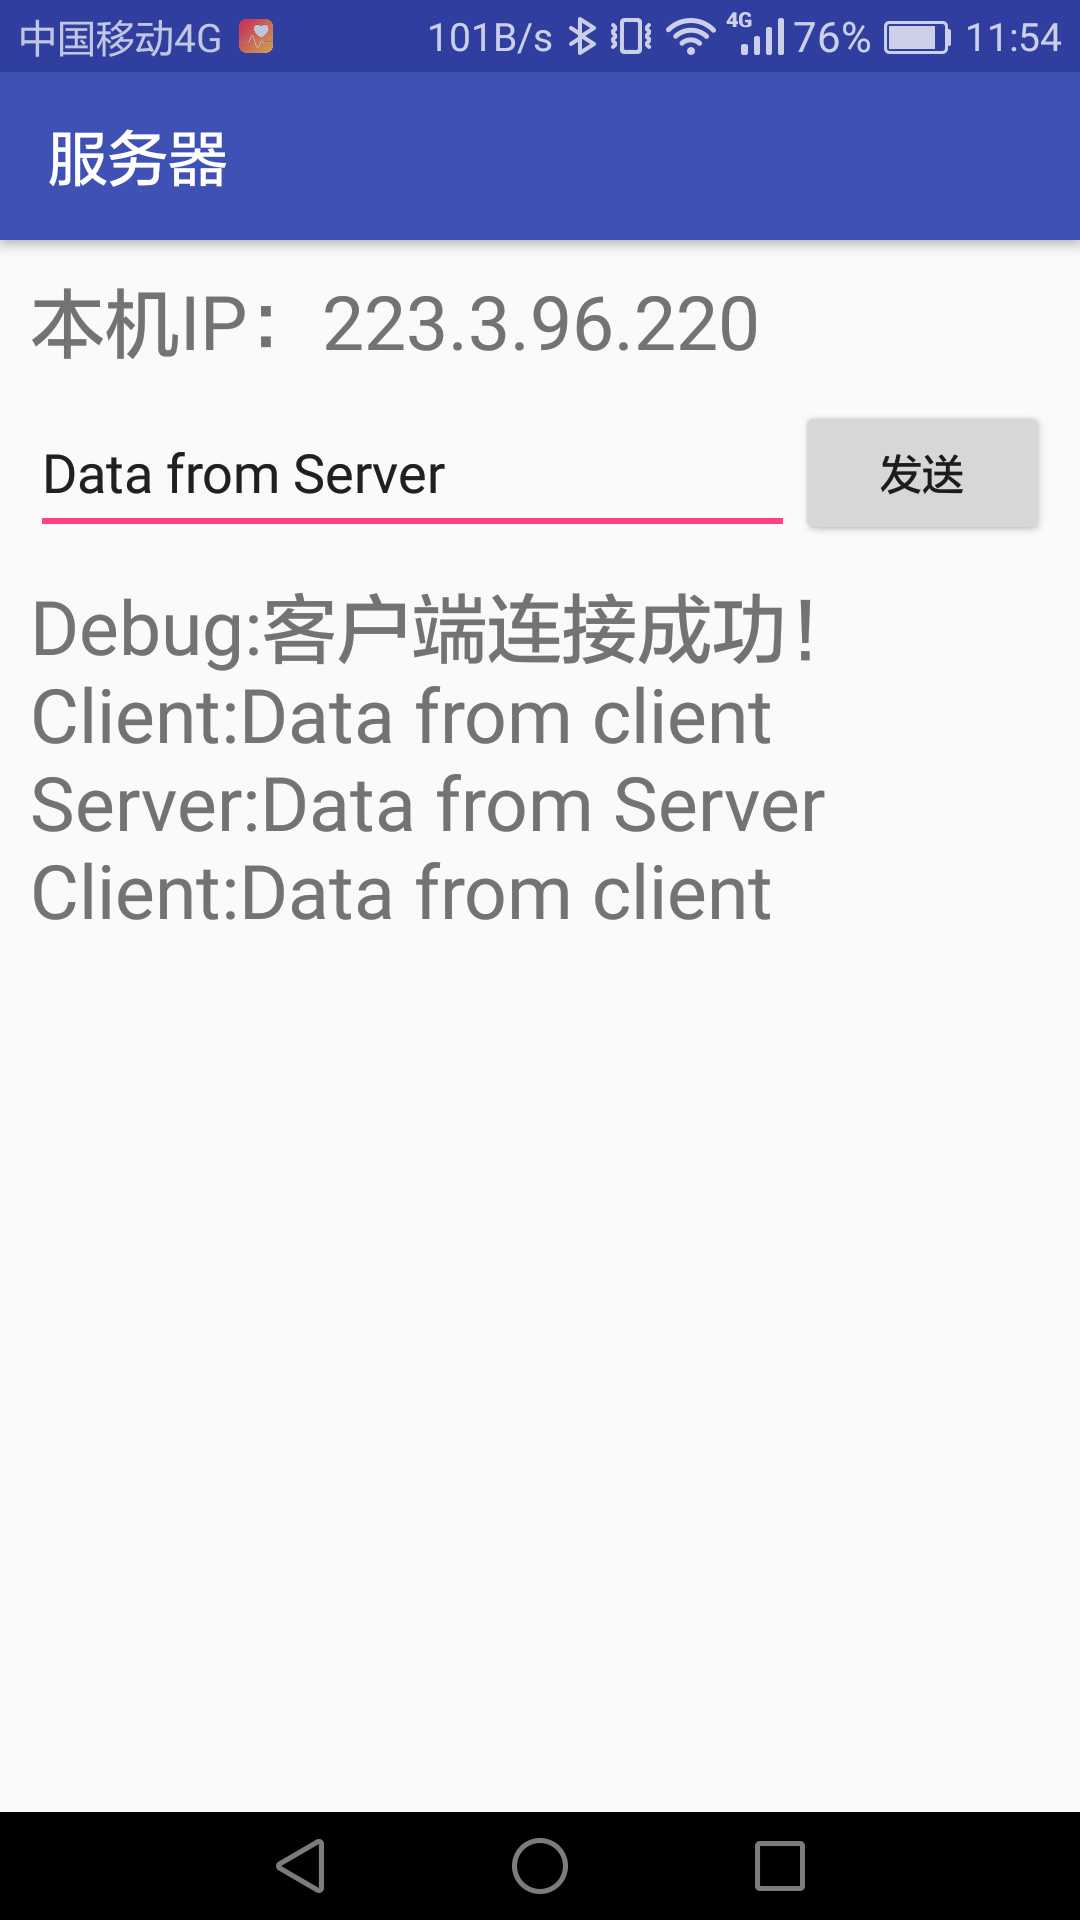
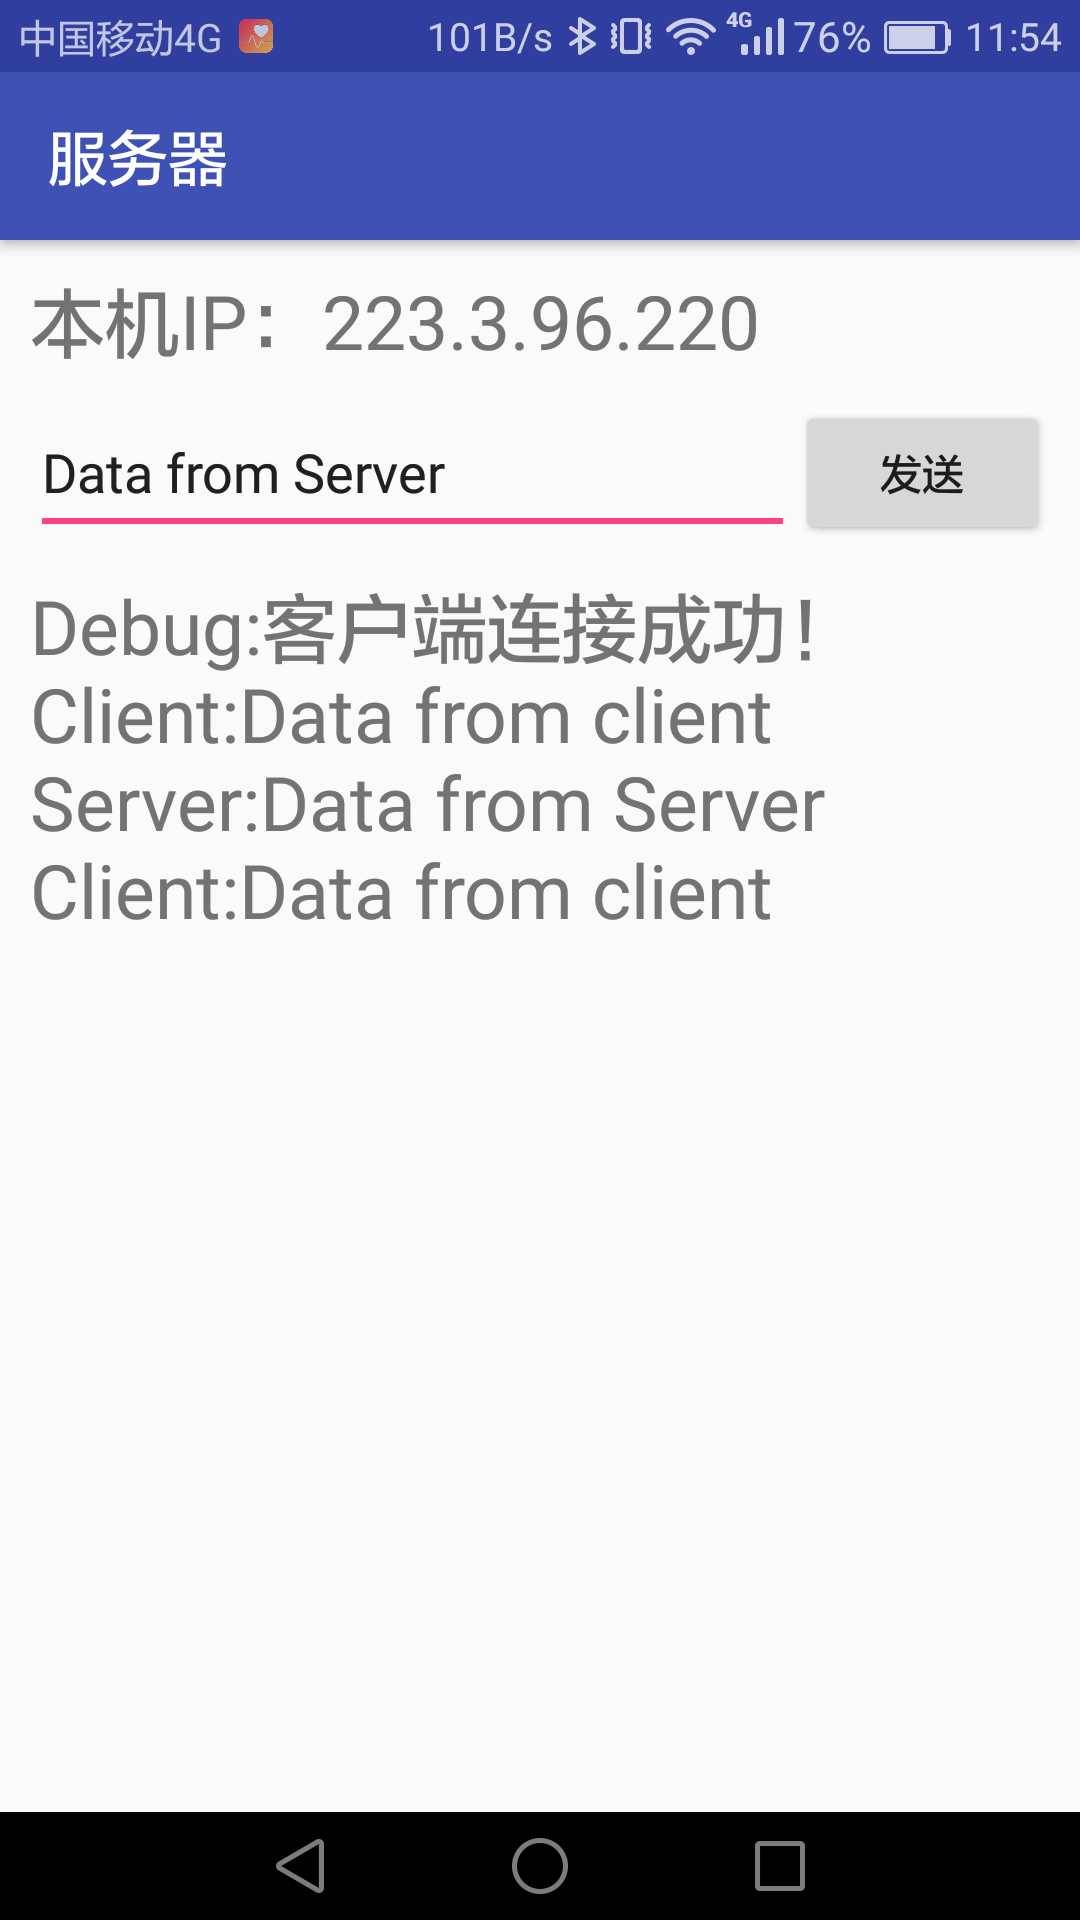
  1 package com.example.john.androidsockettest;
  2
  3 import android.content.Context;
  4 import android.net.ConnectivityManager;
  5 import android.net.NetworkInfo;
  6 import android.net.wifi.WifiInfo;
  7 import android.net.wifi.WifiManager;
  8 import android.os.Handler;
  9 import android.os.Message;
 10 import android.support.v7.app.AppCompatActivity;
 11 import android.os.Bundle;
 12 import android.view.View;
 13 import android.widget.Button;
 14 import android.widget.EditText;
 15 import android.widget.TextView;
 16
 17 import java.io.BufferedReader;
 18 import java.io.IOException;
 19 import java.io.InputStreamReader;
 20 import java.io.OutputStream;
 21 import java.net.Inet4Address;
 22 import java.net.InetAddress;
 23 import java.net.NetworkInterface;
 24 import java.net.ServerSocket;
 25 import java.net.Socket;
 26 import java.net.SocketException;
 27 import java.util.Enumeration;
 28
 29 public class MainActivity extends AppCompatActivity {
 30
 31     //线程及套接字定义
 32     public Socket socket = null;
 33     public ServerSocket serverSocket = null;
 34     private AcceptThread acceptThread = null;
 35     private ReceiveThread receiveThread = null;
 36     private SendThread sendThread = null;
 37     //Handler中的消息类型
 38     public static final int DEBUG = 0x00;
 39     public static final int RECEIVEDATAFROMCLIENT = 0x01;
 40     public static final int SENDDATATOCLIENT = 0x02;
 41     //控件
 42     private TextView localIPTextView;
 43     private EditText messagetoSendEditText;
 44     private Button sendButton;
 45     private TextView displayTextView;
 46     //变量定义
 47     String messagetoSend="";
 48
 49     public Handler myHandler = new Handler() {
 50         @Override
 51         public void handleMessage(Message msg) {
 52             if (msg.what == RECEIVEDATAFROMCLIENT) {
 53                 Bundle bundle = msg.getData();
 54                 displayTextView.append("Client:"+bundle.getString("string1")+"\n");
 55             }
 56             else if (msg.what == DEBUG) {
 57                 Bundle bundle = msg.getData();
 58                 displayTextView.append("Debug:"+bundle.getString("string1")+"\n");
 59             }
 60             else if (msg.what == SENDDATATOCLIENT) {
 61                 Bundle bundle = msg.getData();
 62                 displayTextView.append("Server:"+bundle.getString("string1")+"\n");
 63             }
 64         }
 65
 66     };
 67     //子线程更新UI
 68     public void SendMessagetoHandler(final int messageType , String string1toHandler){
 69         Message msg = new Message();
 70         msg.what = messageType;    //消息类型
 71         Bundle bundle = new Bundle();
 72         bundle.clear();
 73         bundle.putString("string1", string1toHandler); //向bundle中添加字符串
 74         msg.setData(bundle);
 75         myHandler.sendMessage(msg);
 76     }
 77     @Override
 78     protected void onCreate(Bundle savedInstanceState) {
 79         super.onCreate(savedInstanceState);
 80         setContentView(R.layout.activity_main);
 81         //控件对象获取
 82         localIPTextView = (TextView)findViewById(R.id.LocalIPTextView);
 83         messagetoSendEditText = (EditText)findViewById(R.id.MessagetoSendEditText);
 84         sendButton = (Button)findViewById(R.id.SendButton);
 85         displayTextView = (TextView)findViewById(R.id.DisplayTextView);
 86         //服务器IP获取显示
 87         localIPTextView.setText("本机IP:"+getIPAddress(this));
 88         //开启接受线程
 89         acceptThread = new AcceptThread();
 90         acceptThread.start();
 91         sendButton.setOnClickListener(new View.OnClickListener() {
 92
 93         @Override
 94         public void onClick(View v) {
 95             messagetoSend = messagetoSendEditText.getText().toString();
 96             //使用连接成功后得到的socket构造发送线程,每点击一次send按钮触发一次发送线程
 97             sendThread = new SendThread(socket);
 98             sendThread.start();
 99         }
100     });
101
102     }
103     //*****  接受线程  *****
104     class AcceptThread extends Thread{
105         @Override
106         public void run() {
107             try{
108                 serverSocket = new ServerSocket(8086);
109                 socket = serverSocket.accept();
110             }catch (IOException e){
111                 e.printStackTrace();
112             }
113             SendMessagetoHandler(DEBUG,"客户端连接成功!");
114             //构造并开启接收线程
115             receiveThread = new ReceiveThread(socket);
116             receiveThread.start();
117         }
118     }
119     //********  接收线程  **********
120     class ReceiveThread extends Thread{
121
122         private Socket mSocket;
123         //接收线程的构造函数,由接受线程传入套接字
124         public ReceiveThread(Socket socket){mSocket = socket;}
125         @Override
126         public void run() {
127             while(true){               //连接成功后将一直运行
128                 try {
129                     BufferedReader bufferedReader;
130                     String line = null;
131                     String readBuffer="";
132                     bufferedReader = new BufferedReader(new InputStreamReader(mSocket.getInputStream()));
133
134                     while ((line = bufferedReader.readLine()) != null) {
135                         readBuffer = line + readBuffer;
136                         SendMessagetoHandler(RECEIVEDATAFROMCLIENT,readBuffer);
137                         readBuffer = "";
138                     }
139
140                 }catch (IOException e) {
141                     e.printStackTrace();
142                     //更新UI:显示发送错误信息
143                     SendMessagetoHandler(DEBUG,"接收失败!");
144                     return;
145                 }
146             }
147         }
148     }
149     //********  发送线程  **********
150     class SendThread extends Thread{
151         private Socket mSocket;
152         //发送线程的构造函数,由接受线程传入套接字
153         public SendThread(Socket socket) {mSocket = socket;}
154
155         @Override
156         public void run() {
157             try{
158                 OutputStream outputStream = mSocket.getOutputStream();
159                 //向服务器发送信息
160                 outputStream.write(messagetoSend.getBytes("gbk"));
161                 outputStream.flush();
162                 //更新UI:显示发送出的数据
163                 SendMessagetoHandler(SENDDATATOCLIENT,messagetoSend);
164             }catch (IOException e) {
165                 e.printStackTrace();
166                 //更新UI:显示发送错误信息
167                 SendMessagetoHandler(DEBUG,"发送失败!");
168                 return;
169             }
170         }
171     }
172     //*****  获取本机的ip地址
173     private String getlocalip(){
174         WifiManager wifiManager = (WifiManager)this.getApplicationContext().getSystemService(Context.WIFI_SERVICE);
175         WifiInfo wifiInfo = wifiManager.getConnectionInfo();
176         int ipAddress = wifiInfo.getIpAddress();
177         //  Log.d(Tag, "int ip "+ipAddress);
178         if(ipAddress==0)return null;
179         return ((ipAddress & 0xff)+"."+(ipAddress>>8 & 0xff)+"."
180                 +(ipAddress>>16 & 0xff)+"."+(ipAddress>>24 & 0xff));
181     }
182
183     public static String getIPAddress(Context context) {
184         NetworkInfo info = ((ConnectivityManager) context
185                 .getSystemService(Context.CONNECTIVITY_SERVICE)).getActiveNetworkInfo();
186         if (info != null && info.isConnected()) {
187             if (info.getType() == ConnectivityManager.TYPE_MOBILE) {//当前使用2G/3G/4G网络
188                 try {
189                     //Enumeration<NetworkInterface> en=NetworkInterface.getNetworkInterfaces();
190                     for (Enumeration<NetworkInterface> en = NetworkInterface.getNetworkInterfaces(); en.hasMoreElements(); ) {
191                         NetworkInterface intf = en.nextElement();
192                         for (Enumeration<InetAddress> enumIpAddr = intf.getInetAddresses(); enumIpAddr.hasMoreElements(); ) {
193                             InetAddress inetAddress = enumIpAddr.nextElement();
194                             if (!inetAddress.isLoopbackAddress() && inetAddress instanceof Inet4Address) {
195                                 return inetAddress.getHostAddress();
196                             }
197                         }
198                     }
199                 } catch (SocketException e) {
200                     e.printStackTrace();
201                 }
202
203             } else if (info.getType() == ConnectivityManager.TYPE_WIFI) {//当前使用无线网络
204                 WifiManager wifiManager = (WifiManager) context.getSystemService(Context.WIFI_SERVICE);
205                 WifiInfo wifiInfo = wifiManager.getConnectionInfo();
206                 int ipAddress = wifiInfo.getIpAddress();//得到IPV4地址
207                 return ((ipAddress & 0xff)+"."+(ipAddress>>8 & 0xff)+"."  //将得到的int类型的IP转换为String类型
208                         +(ipAddress>>16 & 0xff)+"."+(ipAddress>>24 & 0xff));
209             }
210         } else {
211             //当前无网络连接,请在设置中打开网络
212         }
213         return null;
214     }
215 }
五.Debug
- readLine()
在实际调试当中,还是遇到了上一篇博文中readLine问题,仍将代码贴下:
1 while ((line = bufferedReader.readLine()) != null) {
2                         readBuffer = line + readBuffer;
3                         SendMessagetoHandler(RECEIVEDATAFROMCLIENT,readBuffer);
4                         readBuffer = "";
5                     }
这段读取输入流的代码与上篇博文是一样的,但调试的结果却有不同。上一篇中,服务器向客户端发送数据,即使没有带回车换行符,UI也会更新显示;然而这一篇中,客户端向服务器发送数据,如果数据结束不带上回车换行符的话,UI就不会更新显示,直到将客户端端口关闭,这时之前发送的数据会一下显示到UI。一样的代码,不一样的结果,很是不解,欢迎指教!
六.实际运行效果