1 系统概要说明
1.1 开发目的
闲暇时光想看看电影?我要看些什么好呢?百度推荐出来的烂片也不在其数,如果有一个真实反映影片的平台该多好,这就是淘智宝的产生,为电影连续剧爱好人群提供一个可以自由言论的平台,我喜欢的电影我可以发上去,看看别人是否也会喜欢,综合评价下来,影视爱好者一定能收获自己最想看的年度好片。
好片是千人的智慧产生,而不掺杂广告票房目的,如果我们都看过这部片,评论区交流一下一拍即合,也许我们能够成为好朋友呢?我看你的个人中心你喜欢的电影我都看过,我们是不是就有说不完的话题了呢?
1.2 需求分析
那么首先,我们需要注册一个用户,用户名和密码的长度6-12位为宜,注册用户后我们需要登录上去,最好是去个人中心上传你的头像,让更多人注意到你,然后,就可以开始发布一篇新影评了,发布上去后,根据时间的排序,你的影评很快就会被人看到,他们评论了你的影评,也觉得这部电影很好,就会收藏到收藏夹,下次想看电影的时候翻出来看看,或者是给你点了个赞,但是还没有特别的喜欢,可能只是你的影评写的不错。为了账户的安全,我们还可以去个人中心定期修改一下密码,觉得最近的自拍照很好看,也可以更换头像让大家看到。
如果我只是一名游客,我不想注册新用户,那么我可以去排行榜看看大家到底喜欢什么电影,如果还是看不出来,我可以去详情页下载电子书剧情介绍,觉得不错再去电影院看。每个人都有自己喜欢的电影类型,可以按分类筛选,如果游客对一部电影早有耳闻,只想看看评价,那么在搜索框模糊搜索电影的名字,或者主人公的名字,都能够搜索出来。
2 网站结构设计
2.1 结构分析

2.2 开发方案及使用技术
目前市场流行影视网站网站,用户都可以在上面与一起观看该电影的人分享自己的看法,对于平台上,更多的数据不是我们产生,而是用户的上网行为影响到自己所看的内容,我们称之为人机交互,也就是我们现在所说的WEB2.0开发模式。
前端框架,使用的是DIV+CSS的布局,同时使用了AJAX技术,提高了用户的体现。
后端框架,使用的是Python的Flask框架,这是一款累轻量框架。适合开发中小型系统,并且可以快速开发。
2.3 功能用法分析
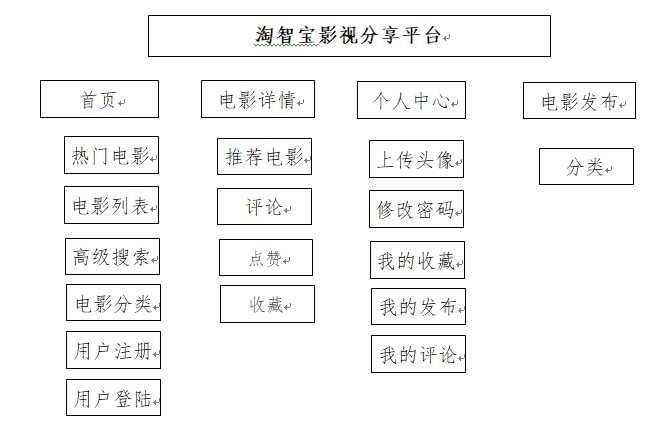
首页主要包括:
1) 热门文章。给用户推荐平台上,点击数量最大的前五本书,让用户可以了解大家都喜欢什么样的书。
2) 文章列表。每一本书的标题、时间、作者、分享还有简介的摘要也会以一条条的形式显示在首页,而且每一秒都会显示再新的分享,图片展示方式更容易吸引眼球。
3) 高级搜索。单一的搜索只能找到书中有过的关键字,高级搜索可以将多个条件同时录入进行搜索。
4) 文章分类。以类别分别显示文章列表。
5) 注册。新用户注册平台账号。
6) 登陆。登录账号去管理个人中心中的个人信息。
7) 排行版:查看最近都有哪些热门电影,越多人喜欢的电影你肯定也会喜欢。
详情页是指文章点进去后,显示文章内容的页面,其中还包括以下:
1) 推荐文章。推荐你喜欢的文章。
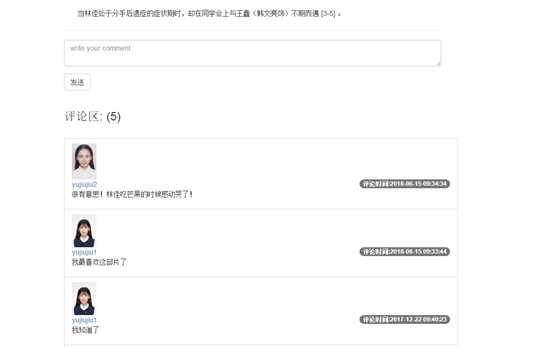
2) 评论。表达用户对这篇文章的看法。
3) 点赞。觉得写的好,就点个赞吧。
4) 收藏。把你认为好的,以后还会看收藏起来,在我的个人中心,以后还可以点开来看。
5) 下载。下载电子书,剧情先知道。
对于有以登录的用户,平台还提供了个人中心去管理自己的信息:
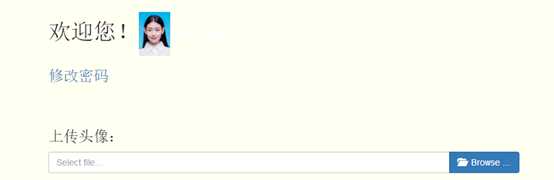
1) 上传头像。用户可以自定义自己的头像,默认是一个黑色的头像,上传有自己个性的头像,可以让别人更加容易记得自己。
2) 修改密码。为了账号安全,定期修改密码。
3) 我的收藏。把你认为好的,以后还会看收藏起来,在我的个人中心,以后还可以点开来看。
4) 我的发布。自己曾经发布过的文章可以再次打开的看,也可以有不对的地方再次编辑。
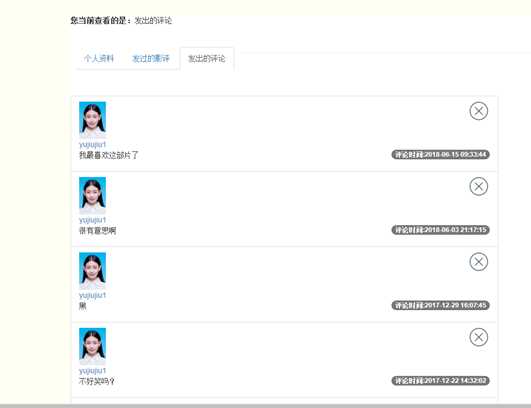
5) 我的评论。你对别人的评论,可以在这里看到,也可删除你认为说法有误的评论。
3 模块详细设计
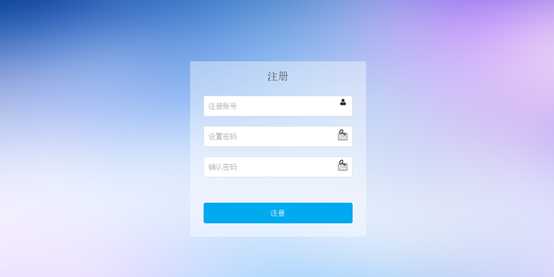
3.1 注册
# 注册
@app.route(‘/register/‘, methods=[‘GET‘, ‘POST‘])
def register():
if request.method == ‘GET‘:
return render_template(‘register.html‘)
else:
username = request.form.get(‘username‘)
password = request.form.get(‘password‘)
say = request.form.get(‘say‘)
user = User.query.filter(User.username == username).first()
# 判断用户名是否存在
if user:
return u‘ username existed‘
else:
user = User(username=username, password=password, say=say)
db.session.add(user)
db.session.commit()
return redirect(url_for(‘login‘))
3.2 登录
# 登录

@app.route(‘/login/‘, methods=[‘GET‘, ‘POST‘])

def login():

    if request.method == ‘GET‘:

        return render_template(‘denglu.html‘)

    else:

        usern = request.form.get(‘username‘)

        passw = request.form.get(‘password‘)

        user = User.query.filter(User.username == usern).first()

        # 判断用户名是否存在

        if user:

            if user.check_password(passw):

                session[‘user‘] = usern  # 字典键值

                session[‘userid‘] = user.id

                session.permanent = True

                return redirect(url_for(‘index‘))

            else:

                return u‘ password error‘

        else:

            return u‘ username  not existed‘


# 判断是否登陆,有则在导航栏显示用户名

@app.context_processor

def mycontext():

    usern = session.get(‘user‘)

    user = User.query.filter(User.username == usern).first()

    if usern:

        return {‘username‘: usern, ‘user‘: user}

    else:

        return {}


# 登出,清除session

@app.route(‘/logout‘)

def logout():

    session.clear()

    return redirect(url_for(‘index‘))
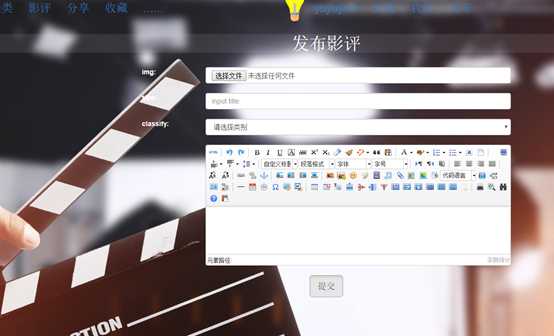
3.3 发布
# 发布前登陆装饰器

def loginFirst(func):  # 参数是函数

    @wraps(func)

    def wrapper(*args, **kwargs):  # 定义个函数将其返回

        if session.get(‘user‘):

            return func(*args, **kwargs)

        else:

            return redirect(url_for(‘login‘))


    return wrapper  # 返回一个函数
#发布问答
1.编写要求登录的装饰器

from functools import wraps

def loginFirst(func): #参数是函数

@wraps(func)

      def wrapper(*args, ** kwargs): #定义个函数将其返回

          #要求登录

          return func(*args, ** kwargs)

      return wrapper #返回一个函数


2.应用装饰器,要求在发布前进行登录,登录后可发布。

@app.route(‘/question/‘,methods=[‘GET‘,‘POST‘])
@loginFirst
def question():


#发布前登陆装饰器

def loginFirst(func):  # 参数是函数

    @wraps(func)

    def wrapper(*args, **kwargs):  # 定义个函数将其返回

        if session.get(‘user‘):

            return func(*args, **kwargs)

        else:

            return redirect(url_for(‘login‘))

    return wrapper  # 返回一个函数


3.建立发布内容的对象关系映射。

class Question(db.Model):

4.完成发布函数。

  保存到数据库。

  重定向到首页。


#登陆前验证,进入评论进入问答页

@app.route(‘/question/‘,methods=[‘GET‘,‘POST‘])

@loginFirst

def question():

    if request.method==‘GET‘:

        return render_template(‘question.html‘)

    else:

        title=request.form.get(‘title‘)

        detail = request.form.get(‘detail‘)

        author_id = User.query.filter(User.username ==session.get(‘user‘)).first().id

        question = Question(title=title, detail=detail, author_id=author_id)

        db.session.add(question)
db.session.commit()
return redirect(url_for(‘index‘))
3.4 条件组合搜索
# 查找
@app.route(‘/search/‘)
def search():
    qu = request.args.get(‘q‘)
    c = ‘‘ if request.args.get(‘classflyList‘) == None else request.args.get(‘classflyList‘)
    t = ‘-creat_time‘ if request.args.get(‘creat_time‘) == None else ‘creat_time‘ if request.args.get(
        ‘creat_time‘) == ‘0‘ else ‘-creat_time‘
    y = ‘‘ if request.args.get(‘year‘) == None else request.args.get(‘year‘)
    ques = Question.query.filter(
        or_(
            Question.xiazai.contains(qu), Question.detail.contains(qu)
        ),
        Question.classify.like(‘%‘ + c + ‘%‘),
        Question.creat_time.like(‘%‘ + y + ‘%‘),
    ).order_by(t).all()
    return render_template(‘index.html‘, questions=ques)
# 高级查询
@app.route(‘/highSearch/‘)
def highSearch():
    if request.args.get(‘click‘):  # 判断get请求中是否有这个变量传入值
        click = request.args.get(‘click‘)  # basic.html中获取click的限定条数
        ques = Question.query.filter(
            Question.click >= click
        ).order_by(‘-creat_time‘)
        # 如果该问题点赞数大于click中指定的数字,则查找出来,放到ques,并把ques赋值给questions(全部问答显示的列表)显示出来
        return render_template(‘index.html‘, questions=ques)

    if request.args.get(‘comment‘):  # 判断get请求中是否有这个变量传入值
        comment = request.args.get(‘comment‘)  # basic.html中获取comment的限定条数
        com = Question.query.all()  # 获取Question表中的所有问答信息,存到com
        result = []  # 定义一个空列表result
        for qu in com:  # 如果每一个问答信息中的总评论数大于comment中的评论数,就把内容增加到result列表中
            if len(qu.comment) >= int(comment):
                result.append(qu)
                # 把列表内容赋值给questions
        return render_template(‘index.html‘, questions=result)
3.5 收藏
# 收藏
@app.route(‘/col‘, methods=[‘GET‘, ‘POST‘])
@loginFirst
def col():
    user = User.query.filter(User.id == session.get(‘userid‘)).first()
    context = {
        ‘questions‘: user.collection.all(),
        ‘tj‘: Question.query.all()[0:5],
    }

    return render_template(‘collect.html‘, **context)
3.6 修改密码
# 修改密码
@app.route(‘/setPassword/<user_id>‘, methods=[‘GET‘, ‘POST‘])
@loginFirst
def setPassword(user_id):
    if request.method == ‘GET‘:
        if request.args.get(‘info‘):
            info = request.args.get(‘info‘)
        else:
            info = None
        return render_template(‘editPassword.html‘,info=info)
    else:
        user = User.query.filter(User.id == user_id).first()
        if user:
            if user.check_password(request.form.get(‘old‘)):
                user.password = request.form.get(‘new1‘)
                db.session.commit()
                info = ‘修改成功‘
            else:
                info = ‘原密码错误‘
                return redirect(url_for(‘setPassword‘,user_id=user_id,info=info))
        else:
            info = ‘未知错误‘
        return redirect(url_for(‘personcenter‘, user_id=user_id, info=info))
3.7 上传头像
#上传头像
@app.route(‘/uploadLogo/<user_id>‘, methods=[‘GET‘, ‘POST‘])
def uploadLogo(user_id):
    user = User.query.filter(User.id == user_id).first()
    edimg = request.files[‘edimg‘]
    basepath = os.path.dirname(__file__)  # 当前文件所在路径
    upload_path = os.path.join(basepath, ‘static/uploads‘, edimg.filename)  # 注意:没有的文件夹一定要先创建,不然会提示没有该路径
    edimg.save(upload_path)
    user.image = ‘uploads/‘ + edimg.filename
    db.session.commit()
    return redirect(url_for(‘personcenter‘, user_id=user_id));
3.8 评论
# 登陆前验证,进入评论进入问答页
@app.route(‘/question/‘, methods=[‘GET‘, ‘POST‘])
@loginFirst
def question():
    if request.method == ‘GET‘:
        return render_template(‘question.html‘)
    else:
        xiazai = request.form.get(‘xiazai‘)
        title = request.files[‘title‘]
        basepath = os.path.dirname(__file__)  # 当前文件所在路径
        upload_path = os.path.join(basepath, ‘static/fengmian‘, title.filename)  # 注意:没有的文件夹一定要先创建,不然会提示没有该路径
        title.save(upload_path)  # 存进服务器
        detail = request.form.get(‘detail‘)
        author_id = User.query.filter(User.username == session.get(‘user‘)).first().id
        classify = request.form.get(‘classify‘)
        question = Question(title=‘http://127.0.0.1:5000/static/fengmian/‘ + title.filename, xiazai=xiazai, detail=detail, author_id=author_id, classify=classify)
        # question.author=author_id
        db.session.add(question)
        db.session.commit()
        return redirect(url_for(‘index‘))
4 数据库设计
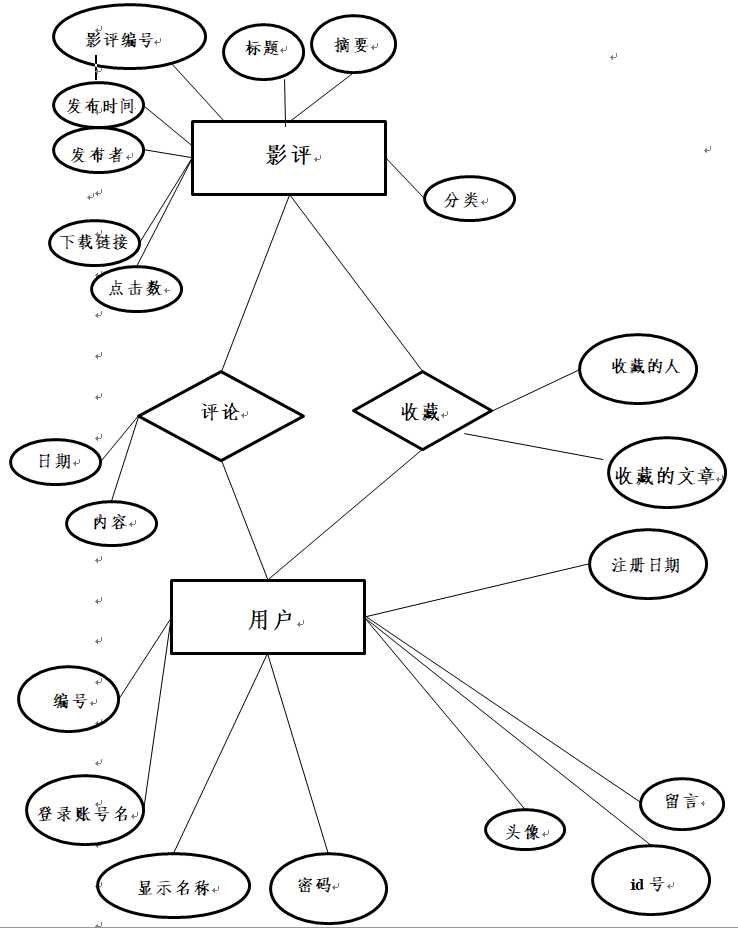
4.2 程序模型现实
# 收藏表
Collection = db.Table(
    ‘collection‘,
    db.Column(‘id‘, db.Integer, primary_key=True, autoincrement=True),
    db.Column(‘q‘, db.Integer, db.ForeignKey(‘question.id‘)),  # 评论对应的文章的id
    db.Column(‘u‘, db.Integer, db.ForeignKey(‘user.id‘)),  # 收藏用户的id
)


#用户表
class User(db.Model):
    __tablename__ = ‘user‘
    # 建立一个表user
    id = db.Column(db.Integer, primary_key=True, autoincrement=True)
    username = db.Column(db.String(20), nullable=False)
    _password = db.Column(db.String(200), nullable=False)
    image = db.Column(db.String(100), default=‘uploads/default_logo.jpg‘)
    say = db.Column(db.String(50))
    collection = db.relationship(‘Question‘, secondary=Collection, backref=db.backref(‘user‘, lazy=‘dynamic‘),
                                 lazy=‘dynamic‘)

    @property
    def password(self):  # 外部使用
        return self._password

    @password.setter
    def password(self, row_password):
        self._password = generate_password_hash(row_password)

    def check_password(self, row_password):
        result = check_password_hash(self._password, row_password)
        return result

# 建立一表question
class Question(db.Model):
    __tablename__ = ‘question‘

    id = db.Column(db.Integer, primary_key=True, autoincrement=True)
    title = db.Column(db.String(100), nullable=False)
    detail = db.Column(db.Text, nullable=False)
    xiazai = db.Column(db.Text, nullable=False)
    creat_time = db.Column(db.DateTime, default=datetime.now)
    author_id = db.Column(db.Integer, db.ForeignKey(‘user.id‘))
    author = db.relationship(‘User‘, backref=db.backref(‘question‘))
    classify = db.Column(db.Enum(‘都市言情‘, ‘青春校园‘, ‘古装玄幻‘, ‘悬疑惊悚‘), nullable=False)
    click = db.Column(db.INT, default=0)


# 评论表

class Comment(db.Model):
    __tablename__ = ‘comment‘
    # 建立一个表log
    id = db.Column(db.Integer, primary_key=True, autoincrement=True)
    author_id = db.Column(db.Integer, db.ForeignKey(‘user.id‘))
    question_id = db.Column(db.Integer, db.ForeignKey(‘question.id‘))
    creat_time = db.Column(db.DateTime, default=datetime.now)
    detail = db.Column(db.Text, nullable=False)
    question = db.relationship(‘Question‘, backref=db.backref(‘comment‘, order_by=creat_time.desc))
    author = db.relationship(‘User‘, backref=db.backref(‘comment‘))
5 系统实现的关键算法与数据结构
5.1 背景开关灯的实现
运行JavaScript代码,添加点击事件,来响应并改变背景的CSS样式,则达到开关灯的功能。
function mySwitch() {
    var oBody = document.getElementById("myBody");
    var ogood = document.getElementById("mygood");
    var oOnOff = document.getElementById("myOnOff");

    if (oOnOff.src.match(‘bulbon‘)) {

        oOnOff.src = "http://www.runoob.com/images/pic_bulboff.gif";
        oBody.style.backgroundColor = "black";

        oBody.style.color = "white";
         ogood.style.display="none";
    } else {
        oOnOff.src = "http://www.runoob.com/images/pic_bulbon.gif";
        oBody.style.backgroundColor = "white";
        oBody.style.color = "black";

         ogood.style.display="block";

    }
}
5.2 图片与文件的上传下载实现
一键下载电子书,以txt文件形式保存到你的电脑,更方便快捷下次查看
    <span style="width:300px;float:left;margin-top: 230px;margin-left:-235px">电子书下载: <input id="fat-btn"
                                                                                          class="btn btn-default"
                                                                                        type="button"
                                                                                        value=‘Download‘
                                                                                        onclick="location.href=‘{{ url_for(‘download‘,filename=‘static‘,question_id=ques.xiazai) }}‘"></span>
# 下载
@app.route(‘/<filename>/<question_id>‘)
def download(filename, question_id):
    quest = Question.query.filter(Question.id == question_id).first()  # 从Question表查找出对应的问答id
    context = {
        ‘questions‘: Question.query.order_by(‘-creat_time‘).all()

    }

    return render_template(‘detail.html‘, **context, ques=quest)
上传头像,让他人更好的认识你
# 上传头像
@app.route(‘/uploadLogo/<user_id>‘, methods=[‘GET‘, ‘POST‘])
def uploadLogo(user_id):
    user = User.query.filter(User.id == user_id).first()
    edimg = request.files[‘edimg‘]
    basepath = os.path.dirname(__file__)  # 当前文件所在路径
    upload_path = os.path.join(basepath, ‘static/uploads‘, edimg.filename)  # 注意:没有的文件夹一定要先创建,不然会提示没有该路径
    edimg.save(upload_path)
    user.image = ‘uploads/‘ + edimg.filename
    db.session.commit()
    return redirect(url_for(‘personcenter‘, user_id=user_id));
5.3 修改密码提示
# 修改密码
@app.route(‘/setPassword/<user_id>‘, methods=[‘GET‘, ‘POST‘])
@loginFirst
def setPassword(user_id):
    if request.method == ‘GET‘:

        if request.args.get(‘info‘):
            info = request.args.get(‘info‘)
        else:
            info = None
        return render_template(‘editPassword.html‘,info=info)
    else:
        user = User.query.filter(User.id == user_id).first()
        if user:
            if user.check_password(request.form.get(‘old‘)):
                user.password = request.form.get(‘new1‘)
                db.session.commit()
                info = ‘修改成功‘
            else:
                info = ‘原密码错误‘
                return redirect(url_for(‘setPassword‘,user_id=user_id,info=info))
        else:
            info = ‘未知错误‘
        return redirect(url_for(‘personcenter‘, user_id=user_id, info=info))


 页面中:通过定义info提示框实现在后台应用js代码

<script>
    {% if info %}
        alert(‘{{ info }}‘)
    {% endif %}
</script>
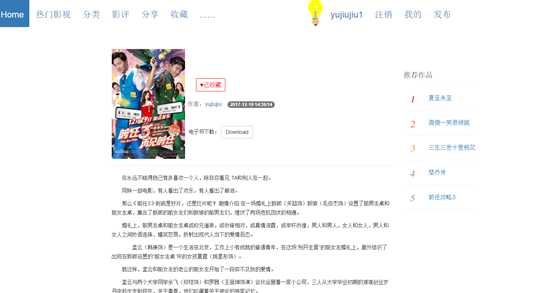
6 成品展示
1网站父模板统一布局

2注册、登录、注销


点击注销,呈现的内容不一样,收藏夹需要登录前验证

3.发布引用编辑插件、影评列表div+css显示

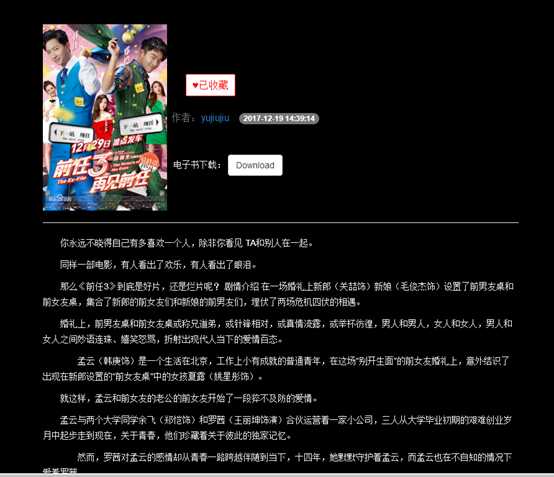
4.详情页
夜晚开启护眼模式:
5.评论、列表显示
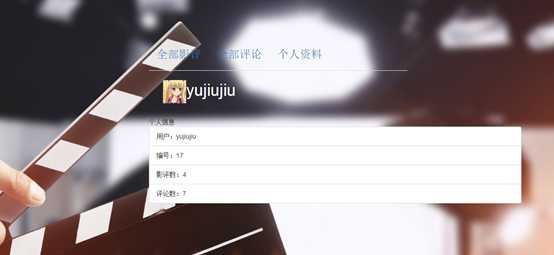
6.个人中心
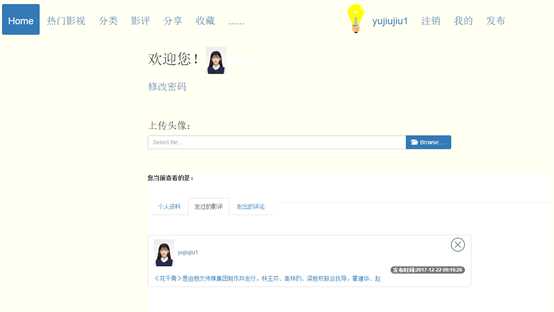
我对这个作者有兴趣,我想看看她的资料(用户中心):
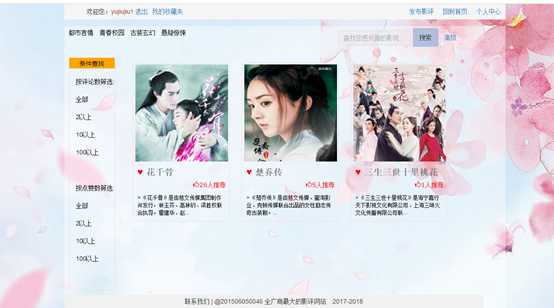
7.搜索,条件组合搜索
Eg:这是点赞数10以上、评论2以上的

8.文章分类、显示(古装玄幻类为例)
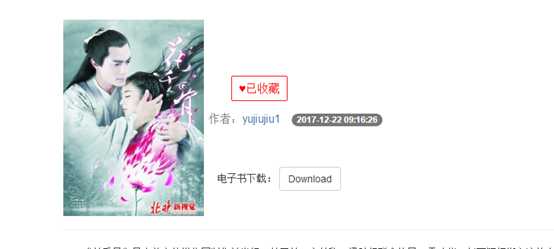
9点赞、收藏
Eg:点了个赞变成27:

Eg:没收藏的时候是这样的:
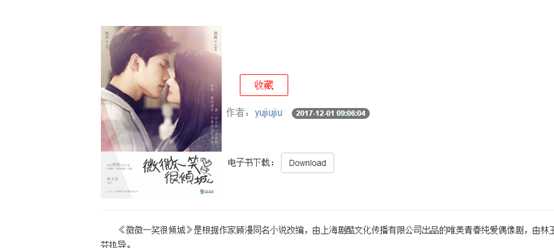
Eg:收藏后是这样的:
10修改密码、头像、上传头像
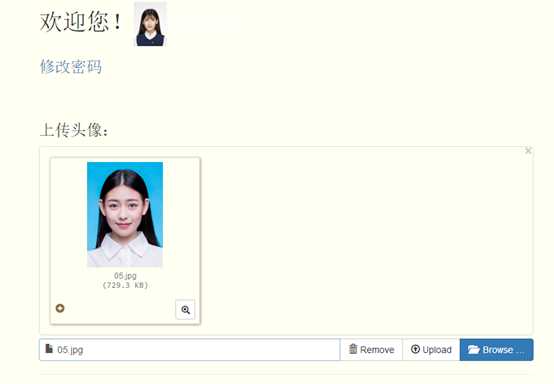
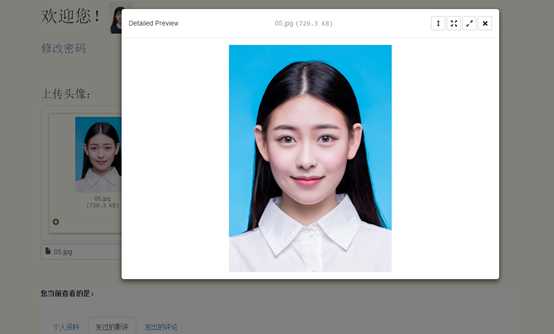
上传头像和预览如下:
觉得可以就点击upload就换好头像
11我的发布、点赞、收藏、评论
我发过的影评在这里(可删除自己的影评):
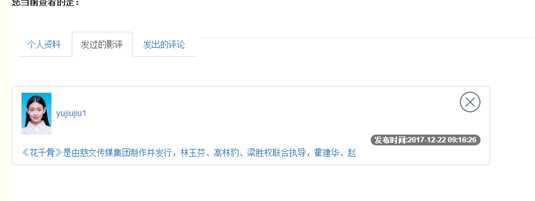
我发过的评论在这里(可删除自己的评论):
收藏过的影评:

12高级搜索
可同时按分类按时间排序:

13热门文章、推荐文章
推荐的作品在详情页可以看到: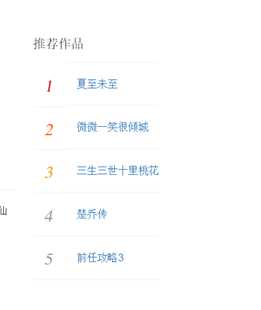
热门的作品在排行榜可以看到:
14下载文件
点击电子书下载,可以下载到我的电脑
