一、下载Tensorflow object detection API工程源码
网址:https://github.com/tensorflow/models,可通过Git下载,打开Git Bash,输入git clone https://github.com/tensorflow/models.git进行下载。
二、标记需要训练的图片
①、在第一步下载的工程文件models\research\object_detection目录下,建立一个my_test_images用来放测试test和训练train的文件夹。将需要识别的图片放在test和train中进行训练和测试。
②、到https://tzutalin.github.io/labelImg/下载labelImg工具,打开labelImg.exe,点击open dir,打开models\research\object_detection\my_test_images\test和train,对里面的所有照片标注完成,标注完成后保存为与图片名字一样的.xml文件。
③、在models\research\object_detection\my_test_images文件夹下新建名字为xml_to_csv文件夹,在xml_to_csv文件夹下新建test_xml_to_csv.py和train_xml_to_csv.py文件。
test_xml_to_csv.py代码如下:
 1 # -*- coding: utf-8 -*-
 2 """
 3 Created on Wed Mar 13 21:50:27 2019
 4
 5 @author: CFF
 6 """
 7
 8 import os
 9 import glob
10 import pandas as pd
11 import xml.etree.ElementTree as ET
12
13 os.chdir(‘C:\\Users\\CFF\\Desktop\\models\\research\\object_detection\\my_test_images\\test‘)
14 path = ‘C:\\Users\\CFF\\Desktop\\models\\research\\object_detection\\my_test_images\\test‘
15
16 def xml_to_csv(path):
17     xml_list = []
18     for xml_file in glob.glob(path + ‘/*.xml‘):
19         tree = ET.parse(xml_file)
20         root = tree.getroot()
21         for member in root.findall(‘object‘):
22             value = (root.find(‘filename‘).text,
23                      int(root.find(‘size‘)[0].text),
24                      int(root.find(‘size‘)[1].text),
25                      member[0].text,
26                      int(member[4][0].text),
27                      int(member[4][1].text),
28                      int(member[4][2].text),
29                      int(member[4][3].text)
30                      )
31             xml_list.append(value)
32     column_name = [‘filename‘, ‘width‘, ‘height‘, ‘class‘, ‘xmin‘, ‘ymin‘, ‘xmax‘, ‘ymax‘]
33     xml_df = pd.DataFrame(xml_list, columns=column_name)
34     return xml_df
35 def main():
36     image_path = path
37     xml_df = xml_to_csv(image_path)
38     xml_df.to_csv(‘cat_test.csv‘, index=None)#cat_test.csv可以改为自己的文件名
39     print(‘Successfully converted xml to csv.‘)
40 main()
用Spyder打开test_xml_to_csv.py,点击编译,在C:\\Users\\CFF\\Desktop\\models\\research\\object_detection\\my_test_images\\test目录下生成一个cat_test.csv文件,可用Excel打开。
同理,train_xml_to_csv.py代码如下:
 1 # -*- coding: utf-8 -*-
 2 """
 3 Created on Wed Mar 13 21:48:33 2019
 4
 5 @author: CFF
 6 """
 7 import os
 8 import glob
 9 import pandas as pd
10 import xml.etree.ElementTree as ET
11
12 os.chdir(‘C:\\Users\\CFF\\Desktop\\models\\research\\object_detection\\my_test_images\\train‘)
13 path = ‘C:\\Users\\CFF\\Desktop\\models\\research\\object_detection\\my_test_images\\train‘
14
15 def xml_to_csv(path):
16     xml_list = []
17     for xml_file in glob.glob(path + ‘/*.xml‘):
18         tree = ET.parse(xml_file)
19         root = tree.getroot()
20         for member in root.findall(‘object‘):
21             value = (root.find(‘filename‘).text,
22                      int(root.find(‘size‘)[0].text),
23                      int(root.find(‘size‘)[1].text),
24                      member[0].text,
25                      int(member[4][0].text),
26                      int(member[4][1].text),
27                      int(member[4][2].text),
28                      int(member[4][3].text)
29                      )
30             xml_list.append(value)
31     column_name = [‘filename‘, ‘width‘, ‘height‘, ‘class‘, ‘xmin‘, ‘ymin‘, ‘xmax‘, ‘ymax‘]
32     xml_df = pd.DataFrame(xml_list, columns=column_name)
33     return xml_df
34 def main():
35     image_path = path
36     xml_df = xml_to_csv(image_path)
37     xml_df.to_csv(‘cat_train.csv‘, index=None)
38     print(‘Successfully converted xml to csv.‘)
39 main()
用Spyder打开train_xml_to_csv.py,点击编译,在C:\\Users\\CFF\\Desktop\\models\\research\\object_detection\\my_test_images\\train目录下生成一个cat_train.csv文件,可用Excel打开。
三、将cat_train.csv和cat_test.csv文件转换为train.record和test.record数据集
①、先将cat_train.csv和cat_test.csv文件放在C:\\Users\\CFF\\Desktop\\models\\research\\object_detection\\data文件夹下。
②、用Spyder在C:\\Users\\CFF\\Desktop\\models\\research\\object_detection文件夹下新建一个generate_tfrecord.py文件,generate_tfrecord.py代码如下:
 1 # -*- coding: utf-8 -*-
 2 """
 3 Created on Wed Mar 13 21:56:20 2019
 4
 5 @author: CFF
 6 """
 7
 8 """
 9 Usage:
10   # From tensorflow/models/
11   # Create train data:
12   python generate_tfrecord.py --csv_input=data/cat_train.csv    --output_path=data/train.record
13   # Create test data:
14   python generate_tfrecord.py --csv_input=data/cat_test.csv     --output_path=data/test.record
15 """
16
17 import os
18 import io
19 import pandas as pd
20 import tensorflow as tf
21
22 from PIL import Image
23 from object_detection.utils import dataset_util
24 from collections import namedtuple, OrderedDict
25
26 os.chdir(‘C:\\Users\\CFF\\Desktop\\models\\research\\object_detection‘)
27
28 flags = tf.app.flags
29 flags.DEFINE_string(‘csv_input‘, ‘‘, ‘Path to the CSV input‘)
30 flags.DEFINE_string(‘output_path‘, ‘‘, ‘Path to output TFRecord‘)
31 FLAGS = flags.FLAGS
32
33
34 # TO-DO replace this with label map
35 def class_text_to_int(row_label):#标签类型,根据实际情况写
36     if row_label == ‘cat‘:
37         return 1
38     else:
39         None
40
41
42 def split(df, group):
43     data = namedtuple(‘data‘, [‘filename‘, ‘object‘])
44     gb = df.groupby(group)
45     return [data(filename, gb.get_group(x)) for filename, x in zip(gb.groups.keys(), gb.groups)]
46
47
48 def create_tf_example(group, path):
49     with tf.gfile.GFile(os.path.join(path, ‘{}‘.format(group.filename)), ‘rb‘) as fid:
50         encoded_jpg = fid.read()
51     encoded_jpg_io = io.BytesIO(encoded_jpg)
52     image = Image.open(encoded_jpg_io)
53     width, height = image.size
54
55     filename = group.filename.encode(‘utf8‘)
56     image_format = b‘jpg‘
57     xmins = []
58     xmaxs = []
59     ymins = []
60     ymaxs = []
61     classes_text = []
62     classes = []
63
64     for index, row in group.object.iterrows():
65         xmins.append(row[‘xmin‘] / width)
66         xmaxs.append(row[‘xmax‘] / width)
67         ymins.append(row[‘ymin‘] / height)
68         ymaxs.append(row[‘ymax‘] / height)
69         classes_text.append(row[‘class‘].encode(‘utf8‘))
70         classes.append(class_text_to_int(row[‘class‘]))
71
72     tf_example = tf.train.Example(features=tf.train.Features(feature={
73         ‘image/height‘: dataset_util.int64_feature(height),
74         ‘image/width‘: dataset_util.int64_feature(width),
75         ‘image/filename‘: dataset_util.bytes_feature(filename),
76         ‘image/source_id‘: dataset_util.bytes_feature(filename),
77         ‘image/encoded‘: dataset_util.bytes_feature(encoded_jpg),
78         ‘image/format‘: dataset_util.bytes_feature(image_format),
79         ‘image/object/bbox/xmin‘: dataset_util.float_list_feature(xmins),
80         ‘image/object/bbox/xmax‘: dataset_util.float_list_feature(xmaxs),
81         ‘image/object/bbox/ymin‘: dataset_util.float_list_feature(ymins),
82         ‘image/object/bbox/ymax‘: dataset_util.float_list_feature(ymaxs),
83         ‘image/object/class/text‘: dataset_util.bytes_list_feature(classes_text),
84         ‘image/object/class/label‘: dataset_util.int64_list_feature(classes),
85     }))
86     return tf_example
87 def main(_):
88     writer = tf.python_io.TFRecordWriter(FLAGS.output_path)
89     path = os.path.join(os.getcwd(), ‘images‘)
90     examples = pd.read_csv(FLAGS.csv_input)
91     grouped = split(examples, ‘filename‘)
92     for group in grouped:
93         tf_example = create_tf_example(group, path)
94         writer.write(tf_example.SerializeToString())
95     writer.close()
96     output_path = os.path.join(os.getcwd(), FLAGS.output_path)
97     print(‘Successfully created the TFRecords: {}‘.format(output_path))
98 if __name__ == ‘__main__‘:
99     tf.app.run()
打开Anaconda Prompt,分别输入python generate_tfrecord.py –csv_input=data/cat_train.csv –output_path=data/train.record和python generate_tfrecord.py –csv_input=data/cat_test.csv –output_path=data/test.record,在data文件夹下将生成train.record和test.record文件。(注意:出现tensorflow object detection API 验证时报No module named ‘object_detection‘时,在安装路径Anaconda3\Lib\site-packages下,新建tensorflow_model.pth文件,内容为模型文件路径:如C:\Users\CFF\Desktop\mymodels\research 和C:\Users\CFF\Desktop\mymodels\research\slim)
③、在data文件夹下,新建一个cat_label_map.pbtxt文件,用Spyder打开,内容为:
1 item {
2   id: 1
3   name: ‘cat‘
4 }
可根据分类数量进行修改。
四、在C:\Users\CFF\Desktop\models\research\object_detection文件夹下,建立一个training文件夹。
到https://github.com/tensorflow/models/tree/master/research/object_detection/samples/configs下载ssd_mobilenet_v1_coco.config模型,在training文件夹下新建一个文本文档,命名为ssd_mobilenet_v1_coco.config,内容如下:
  1 # SSD with Mobilenet v1 configuration for MSCOCO Dataset.
  2 # Users should configure the fine_tune_checkpoint field in the train config as
  3 # well as the label_map_path and input_path fields in the train_input_reader and
  4 # eval_input_reader. Search for "PATH_TO_BE_CONFIGURED" to find the fields that
  5 # should be configured.
  6
  7 model {
  8   ssd {
  9     num_classes: 1 #根据实际情况填写分类数量
 10     box_coder {
 11       faster_rcnn_box_coder {
 12         y_scale: 10.0
 13         x_scale: 10.0
 14         height_scale: 5.0
 15         width_scale: 5.0
 16       }
 17     }
 18     matcher {
 19       argmax_matcher {
 20         matched_threshold: 0.5
 21         unmatched_threshold: 0.5
 22         ignore_thresholds: false
 23         negatives_lower_than_unmatched: true
 24         force_match_for_each_row: true
 25       }
 26     }
 27     similarity_calculator {
 28       iou_similarity {
 29       }
 30     }
 31     anchor_generator {
 32       ssd_anchor_generator {
 33         num_layers: 6
 34         min_scale: 0.2
 35         max_scale: 0.95
 36         aspect_ratios: 1.0
 37         aspect_ratios: 2.0
 38         aspect_ratios: 0.5
 39         aspect_ratios: 3.0
 40         aspect_ratios: 0.3333
 41       }
 42     }
 43     image_resizer {
 44       fixed_shape_resizer {
 45         height: 300
 46         width: 300
 47       }
 48     }
 49     box_predictor {
 50       convolutional_box_predictor {
 51         min_depth: 0
 52         max_depth: 0
 53         num_layers_before_predictor: 0
 54         use_dropout: false
 55         dropout_keep_probability: 0.8
 56         kernel_size: 1
 57         box_code_size: 4
 58         apply_sigmoid_to_scores: false
 59         conv_hyperparams {
 60           activation: RELU_6,
 61           regularizer {
 62             l2_regularizer {
 63               weight: 0.00004
 64             }
 65           }
 66           initializer {
 67             truncated_normal_initializer {
 68               stddev: 0.03
 69               mean: 0.0
 70             }
 71           }
 72           batch_norm {
 73             train: true,
 74             scale: true,
 75             center: true,
 76             decay: 0.9997,
 77             epsilon: 0.001,
 78           }
 79         }
 80       }
 81     }
 82     feature_extractor {
 83       type: ‘ssd_mobilenet_v1‘
 84       min_depth: 16
 85       depth_multiplier: 1.0
 86       conv_hyperparams {
 87         activation: RELU_6,
 88         regularizer {
 89           l2_regularizer {
 90             weight: 0.00004
 91           }
 92         }
 93         initializer {
 94           truncated_normal_initializer {
 95             stddev: 0.03
 96             mean: 0.0
 97           }
 98         }
 99         batch_norm {
100           train: true,
101           scale: true,
102           center: true,
103           decay: 0.9997,
104           epsilon: 0.001,
105         }
106       }
107     }
108     loss {
109       classification_loss {
110         weighted_sigmoid {
111         }
112       }
113       localization_loss {
114         weighted_smooth_l1 {
115         }
116       }
117       hard_example_miner {
118         num_hard_examples: 3000
119         iou_threshold: 0.99
120         loss_type: CLASSIFICATION
121         max_negatives_per_positive: 3
122         min_negatives_per_image: 0
123       }
124       classification_weight: 1.0
125       localization_weight: 1.0
126     }
127     normalize_loss_by_num_matches: true
128     post_processing {
129       batch_non_max_suppression {
130         score_threshold: 1e-8
131         iou_threshold: 0.6
132         max_detections_per_class: 100
133         max_total_detections: 100
134       }
135       score_converter: SIGMOID
136     }
137   }
138 }
139
140 train_config: {
141   batch_size: 1
142   optimizer {
143     rms_prop_optimizer: {
144       learning_rate: {
145         exponential_decay_learning_rate {
146           initial_learning_rate: 0.004
147           decay_steps: 800720
148           decay_factor: 0.95
149         }
150       }
151       momentum_optimizer_value: 0.9
152       decay: 0.9
153       epsilon: 1.0
154     }
155   }
156 #  fine_tune_checkpoint: "PATH_TO_BE_CONFIGURED/model.ckpt"
157 #  from_detection_checkpoint: true
158   # Note: The below line limits the training process to 200K steps, which we
159   # empirically found to be sufficient enough to train the pets dataset. This
160   # effectively bypasses the learning rate schedule (the learning rate will
161   # never decay). Remove the below line to train indefinitely.
162   num_steps: 200000
163   data_augmentation_options {
164     random_horizontal_flip {
165     }
166   }
167   data_augmentation_options {
168     ssd_random_crop {
169     }
170   }
171 }
172
173 train_input_reader: {
174   tf_record_input_reader {
175     input_path:"data/train.record"
176   }
177   label_map_path:"data/cat_label_map.pbtxt"
178 }
179
180 eval_config: {
181   num_examples: 8000
182   # Note: The below line limits the evaluation process to 10 evaluations.
183   # Remove the below line to evaluate indefinitely.
184   max_evals: 10
185 }
186
187 eval_input_reader: {
188   tf_record_input_reader {
189     input_path:"data/test.record"
190   }
191   label_map_path:"data/cat_label_map.pbtxt"
192   shuffle: false
193   num_readers: 1
194 }
其中,num_classes: 1 是根据实际情况填写分类数量,input_path:”data/train.record”和input_path:”data/test.record”为之前在data文件加下生成的train.record文件和tets.record文件。label_map_path:”data/cat_label_map.pbtxt”也是之前在data中生成的文件。
五、训练模型
打开Anaconda Prompt,通过命令cd C:\Users\CFF\Desktop\models\research\object_detection到该目录下,运行以下命令:
1 python model_main.py --pipeline_config_path=training/ssd_mobilenet_v1_coco.config \ --model_dir=training \ --num_train_steps=50000 \ --num_eval_steps=2000 \
开始训练。训练一段时间后,可以在C:\Users\CFF\Desktop\models\research\object_detection,通过tensorboard –logdir=training命令,根据返回的网址在浏览器中打开,可以看到最新的图表。
六、测试自己的图片
①、在C:\Users\CFF\Desktop\models\research\object_detection\test_images文件夹下放需要识别的图片,用image1-imageN命名。
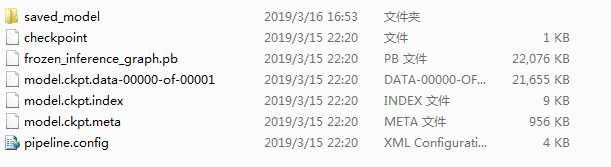
②、打开Anaconda Prompt,通过命令cd C:\Users\CFF\Desktop\models\research\object_detection到该目录下,输入python export_inference_graph.py \ –input_type image_tensor \ –pipeline_config_path training/ssd_mobilement_v1_coco.config \ –trained_checkpoint_prefix training/model.ckpt-9278\ –output_directory cat_detection。其中model.ckpt-9278为训练的最后步数,可在training文件下看到。在cat_detection
下生成以下文件。

③、打开Anaconda Prompt,通过命令cd C:\Users\CFF\Desktop\models\research\object_detection到该目录下,输入jupyter notebook回车,打开交互环境。下载对应的Python文件object_detection_tutorial.py到本地。
④、用Spyder打开object_detection_tutorial.py文件,代码如下:
  1 # coding: utf-8
  2
  3 # # Object Detection Demo
  4 # Welcome to the object detection inference walkthrough!  This notebook will walk you step by step through the process of using a pre-trained model to detect objects in an image. Make sure to follow the [installation instructions](https://github.com/tensorflow/models/blob/master/research/object_detection/g3doc/installation.md) before you start.
  5
  6 # # Imports
  7
  8 # In[1]:
  9
 10
 11 import numpy as np
 12 import os
 13 import six.moves.urllib as urllib
 14 import sys
 15 import tarfile
 16 import tensorflow as tf
 17 import zipfile
 18
 19 from distutils.version import StrictVersion
 20 from collections import defaultdict
 21 from io import StringIO
 22 from matplotlib import pyplot as plt
 23 from PIL import Image
 24
 25 # This is needed since the notebook is stored in the object_detection folder.
 26 sys.path.append("..")
 27 from object_detection.utils import ops as utils_ops
 28
 29 if StrictVersion(tf.__version__) < StrictVersion(‘1.12.0‘):
 30   raise ImportError(‘Please upgrade your TensorFlow installation to v1.12.*.‘)
 31
 32
 33 # ## Env setup
 34
 35 # In[2]:
 36
 37
 38 # This is needed to display the images.
 39 get_ipython().run_line_magic(‘matplotlib‘, ‘inline‘)
 40
 41
 42 # ## Object detection imports
 43 # Here are the imports from the object detection module.
 44
 45 # In[3]:
 46
 47
 48 from utils import label_map_util
 49
 50 from utils import visualization_utils as vis_util
 51
 52
 53 # # Model preparation
 54
 55 # ## Variables
 56 #
 57 # Any model exported using the `export_inference_graph.py` tool can be loaded here simply by changing `PATH_TO_FROZEN_GRAPH` to point to a new .pb file.
 58 #
 59 # By default we use an "SSD with Mobilenet" model here. See the [detection model zoo](https://github.com/tensorflow/models/blob/master/research/object_detection/g3doc/detection_model_zoo.md) for a list of other models that can be run out-of-the-box with varying speeds and accuracies.
 60
 61 # In[4]:
 62
 63
 64 # What model to download.
 65 MODEL_NAME = ‘cat_detection‘
 66 #MODEL_FILE = MODEL_NAME + ‘.tar.gz‘
 67 #DOWNLOAD_BASE = ‘http://download.tensorflow.org/models/object_detection/‘
 68
 69 # Path to frozen detection graph. This is the actual model that is used for the object detection.
 70 PATH_TO_FROZEN_GRAPH = MODEL_NAME + ‘/frozen_inference_graph.pb‘
 71
 72 # List of the strings that is used to add correct label for each box.
 73 PATH_TO_LABELS = os.path.join(‘data‘, ‘cat_label_map.pbtxt‘)
 74
 75
 76 # ## Download Model
 77
 78 # In[5]:
 79
 80
 81 #opener = urllib.request.URLopener()
 82 #opener.retrieve(DOWNLOAD_BASE + MODEL_FILE, MODEL_FILE)
 83 #tar_file = tarfile.open(MODEL_FILE)
 84 #for file in tar_file.getmembers():
 85 #  file_name = os.path.basename(file.name)
 86 #  if ‘frozen_inference_graph.pb‘ in file_name:
 87 #    tar_file.extract(file, os.getcwd())
 88
 89
 90 # ## Load a (frozen) Tensorflow model into memory.
 91
 92 # In[6]:
 93
 94
 95 detection_graph = tf.Graph()
 96 with detection_graph.as_default():
 97   od_graph_def = tf.GraphDef()
 98   with tf.gfile.GFile(PATH_TO_FROZEN_GRAPH, ‘rb‘) as fid:
 99     serialized_graph = fid.read()
100     od_graph_def.ParseFromString(serialized_graph)
101     tf.import_graph_def(od_graph_def, name=‘‘)
102
103
104 # ## Loading label map
105 # Label maps map indices to category names, so that when our convolution network predicts `5`, we know that this corresponds to `airplane`.  Here we use internal utility functions, but anything that returns a dictionary mapping integers to appropriate string labels would be fine
106
107 # In[7]:
108
109
110 category_index = label_map_util.create_category_index_from_labelmap(PATH_TO_LABELS, use_display_name=True)
111
112
113 # ## Helper code
114
115 # In[8]:
116
117
118 def load_image_into_numpy_array(image):
119   (im_width, im_height) = image.size
120   return np.array(image.getdata()).reshape(
121       (im_height, im_width, 3)).astype(np.uint8)
122
123
124 # # Detection
125
126 # In[9]:
127
128
129 # For the sake of simplicity we will use only 2 images:
130 # image1.jpg
131 # image2.jpg
132 # If you want to test the code with your images, just add path to the images to the TEST_IMAGE_PATHS.
133 PATH_TO_TEST_IMAGES_DIR = ‘test_images‘
134 TEST_IMAGE_PATHS = [ os.path.join(PATH_TO_TEST_IMAGES_DIR, ‘image{}.jpg‘.format(i)) for i in range(1, 5) ]
135
136 # Size, in inches, of the output images.
137 IMAGE_SIZE = (12, 8)
138
139
140 # In[10]:
141
142
143 def run_inference_for_single_image(image, graph):
144   with graph.as_default():
145     with tf.Session() as sess:
146       # Get handles to input and output tensors
147       ops = tf.get_default_graph().get_operations()
148       all_tensor_names = {output.name for op in ops for output in op.outputs}
149       tensor_dict = {}
150       for key in [
151           ‘num_detections‘, ‘detection_boxes‘, ‘detection_scores‘,
152           ‘detection_classes‘, ‘detection_masks‘
153       ]:
154         tensor_name = key + ‘:0‘
155         if tensor_name in all_tensor_names:
156           tensor_dict[key] = tf.get_default_graph().get_tensor_by_name(
157               tensor_name)
158       if ‘detection_masks‘ in tensor_dict:
159         # The following processing is only for single image
160         detection_boxes = tf.squeeze(tensor_dict[‘detection_boxes‘], [0])
161         detection_masks = tf.squeeze(tensor_dict[‘detection_masks‘], [0])
162         # Reframe is required to translate mask from box coordinates to image coordinates and fit the image size.
163         real_num_detection = tf.cast(tensor_dict[‘num_detections‘][0], tf.int32)
164         detection_boxes = tf.slice(detection_boxes, [0, 0], [real_num_detection, -1])
165         detection_masks = tf.slice(detection_masks, [0, 0, 0], [real_num_detection, -1, -1])
166         detection_masks_reframed = utils_ops.reframe_box_masks_to_image_masks(
167             detection_masks, detection_boxes, image.shape[0], image.shape[1])
168         detection_masks_reframed = tf.cast(
169             tf.greater(detection_masks_reframed, 0.5), tf.uint8)
170         # Follow the convention by adding back the batch dimension
171         tensor_dict[‘detection_masks‘] = tf.expand_dims(
172             detection_masks_reframed, 0)
173       image_tensor = tf.get_default_graph().get_tensor_by_name(‘image_tensor:0‘)
174
175       # Run inference
176       output_dict = sess.run(tensor_dict,
177                              feed_dict={image_tensor: np.expand_dims(image, 0)})
178
179       # all outputs are float32 numpy arrays, so convert types as appropriate
180       output_dict[‘num_detections‘] = int(output_dict[‘num_detections‘][0])
181       output_dict[‘detection_classes‘] = output_dict[
182           ‘detection_classes‘][0].astype(np.uint8)
183       output_dict[‘detection_boxes‘] = output_dict[‘detection_boxes‘][0]
184       output_dict[‘detection_scores‘] = output_dict[‘detection_scores‘][0]
185       if ‘detection_masks‘ in output_dict:
186         output_dict[‘detection_masks‘] = output_dict[‘detection_masks‘][0]
187   return output_dict
188
189
190 # In[11]:
191
192
193 for image_path in TEST_IMAGE_PATHS:
194   image = Image.open(image_path)
195   # the array based representation of the image will be used later in order to prepare the
196   # result image with boxes and labels on it.
197   image_np = load_image_into_numpy_array(image)
198   # Expand dimensions since the model expects images to have shape: [1, None, None, 3]
199   image_np_expanded = np.expand_dims(image_np, axis=0)
200   # Actual detection.
201   output_dict = run_inference_for_single_image(image_np, detection_graph)
202   # Visualization of the results of a detection.
203   vis_util.visualize_boxes_and_labels_on_image_array(
204       image_np,
205       output_dict[‘detection_boxes‘],
206       output_dict[‘detection_classes‘],
207       output_dict[‘detection_scores‘],
208       category_index,
209       instance_masks=output_dict.get(‘detection_masks‘),
210       use_normalized_coordinates=True,
211       line_thickness=8)
212   plt.figure(figsize=IMAGE_SIZE)
213   plt.imshow(image_np)
MODEL_NAME = ‘cat_detection‘为C:\Users\CFF\Desktop\models\research\object_detection文件加下建立的cat_detection目录。PATH_TO_FROZEN_GRAPH = MODEL_NAME + ‘/frozen_inference_graph.pb‘为
cat_detection目录下的frozen_inference_graph.pb文件,PATH_TO_LABELS = os.path.join(‘data‘, ‘cat_label_map.pbtxt‘)为data文件夹下的cat_label_map.pbtxt文件。PATH_TO_TEST_IMAGES_DIR = ‘test_images‘
为测试图片的路径。TEST_IMAGE_PATHS = [ os.path.join(PATH_TO_TEST_IMAGES_DIR, ‘image{}.jpg‘.format(i)) for i in range(1, 5) ] 是根据图片的数量来修改。保存,编译。在Spyder控制台将输出测试后的图片。