目录
五、es6模块化
把功能进行划分,将同一类型的代码整合在一起,所以模块的功能相对复杂,但都同属于一个业务
为什么有模块化
- js是按顺序加载的,所以一般相互依的js是具有强制性的
- 多个js文件定义的引用会污染全局变量,多人协作开发可能会有冲突
- 可以用闭包
闭包解决多人协作开发
- 只需要写好自己的模块化的命名,就可以很好的避免冲突了,相当于把所有的容错点都聚焦在一个点上,犯错的机会就少了,
- 但是代码的复用性还是很差
// ;是为了防止其他的导入js相互影响
;var xm01 = (function xiaoming01() {
  return {
    aa:"asdas",
    flag: true
  };
}())


//js文件2
;(function () {
  if (xm01.flag) {
    alert("xm01.flag:" + xm01.flag);
  }
}());
组件化类似模块化的更细粒度,组件充当了基本类库一样的东西目的是复用拓展性,模块主要是以功能区分类别划分尽量隔离其他业务
模块化练习
-
xiaoming01.js
// es6的导出,02中导入 export let exa = "222"; let exa1 = "333"; let exb = "333"; export {exb, exa1}; export function fun(){ console.log("asasddsds"); } //export default :import的时候可以自定义命名,一个js中只能有一个default let aaa="export default"; export default aaa; -
xiaoming02.js
// 导入 ,这里需要写上.js import {exa, exa1, exb} from "./xiaoming01.js"; // 01 console.log(exa1, exb); //导入default可以自定义命名 import asd from "./xiaoming01.js"; console.log('export:',asd); //导入全部的导出,并且重命名 import * as all from "./xiaoming01.js"; console.log(all); console.log(all.default) -
01-es6.html
- script需要指定type=module
<!DOCTYPE html>
<html lang="en">
<head>
  <meta charset="UTF-8">
  <title>Title</title>
  <script src="./xiaoming01.js" type="module"></script>
  <script src="./xiaoming02.js" type="module"></script>
</head>
<body>
没有使用导入导出的话:
Uncaught ReferenceError: flag is not defined
at xiaoming02.js:3
    以前是可以执行的先在不知道怎么执行不了了
</body>
</html>
六、webpack
webpack起步
*webpack* 是一个现代 JavaScript 应用程序的*静态模块打包器(module bundler)*。当 webpack 处理应用程序时,它会递归地构建一个*依赖关系图(dependency graph)*,其中包含应用程序需要的每个模块,然后将所有这些模块打包成一个或多个 *bundle*(捆,束),它做的事情是,分析你的项目结构,找到JavaScript模块以及其它的一些浏览器不能直接运行的拓展语言(Scss,TypeScript等),并将其打包为合适的格式以供浏览器使用。-
入口js
//commonjs规范 const {add} = require('./mathUtil.js'); console.log(add(1,3)); //es6规范 import {result} from "./es6.js"; console.log(result); -
es6规范
const result = 45456;
export {result};- common规范
function add(a, b) {
  return a + b;
}

module.exports = {add};
webpack配置
- 导出的时候es6和commonjs不能在一个模块中混用
- 配置webpack.config.js:要使用commonjs规范
//node的包里面的path模块,用来拼接绝对路径
const path = require('path');

//这里要用commonjs导出,不能用es6
module.exports = {
    //打包转换的调用入口和main方法类似
  entry: './src/main.js',
  ouput: {
    //必须使用绝对路径,path.resolve(__dirname,'dist')返回绝对路径
    path: path.resolve(__dirname,'dist'),
    filename: 'bundle.js'
  }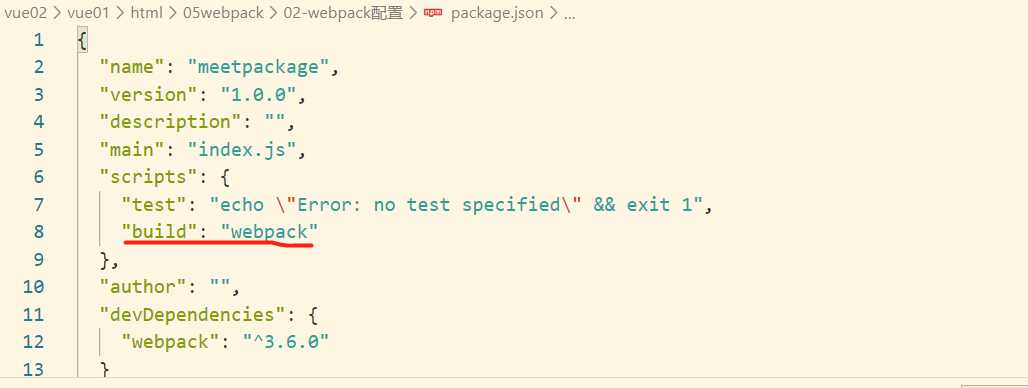
};- package.json配置:json不能有注释
{
"name": "meetpackage",
"version": "1.0.0",
"description": "",
"main": "index.js",
"scripts": {
"test": "echo \"Error: no test specified\" && exit 1",
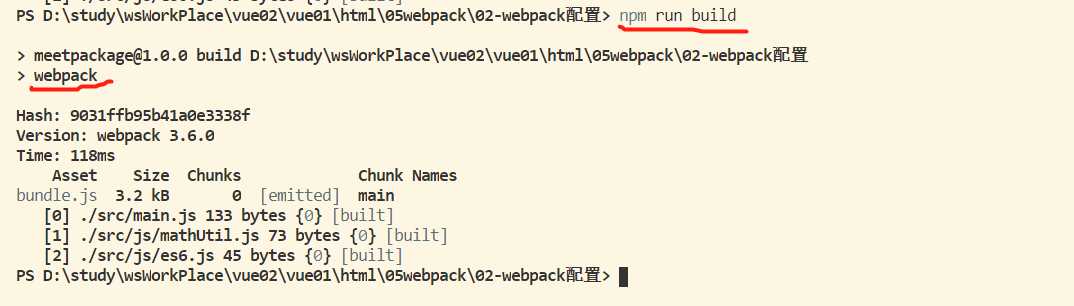
//npm run build 会在这个配置文件中找webpack命令,这个使用的是本地的命令,
//不是全局的webpack,本地是针对于你的这个开发项目
"build":"webpack"
},
"author": "",
//开发的依赖
"devDependencies": {
"webpack": "^3.6.0"
},
//开源才需要这个,json中不能注释
"license": "ISC"
}
- 本地安装:开发时依赖 npm install webpack@3.6.0 –save-dev
- 终端terminal里敲的命令都是全局的
为什么使用–save-dev而不是–save?
--save 会把依赖包名称添加到 package.json 文件 dependencies 下;
--save-dev 则添加到 package.json 文件 devDependencies 键下;
webpack-loader
- 官网可以找到对应的loader安装
- 例:npm install style-loader[@version] –save -dev[表示开发环境用]
- npm install babel-loader@7 babel-core babel-preset-es2015 –save-dev es6转es5
//node的包里面的path模块,用来拼接绝对路径
const path = require('path');

//这里要用commonjs导出,不能用es6
module.exports = {
  entry: './src/main.js',
  output: {
    //必须使用绝对路径
    path: path.resolve(__dirname,'dist'),
    filename: 'bundle.js',
    //为所有的url相关的添加路径
    publicPath:'dist/'
  },
  module:{
    rules: [
      {
        test: /\.css$/,
        // style-loader将模块的导出作为样式添加到 DOM 中
        // loader解析 CSS 文件后,使用 import 加载,并且返回 CSS 代码
        // 从右到左的顺序加载
        use: [ 'style-loader', 'css-loader' ]
      },
      // {
      //   test: /\.(png|jpg|gif)$/,
      //   use: [
      //     {
      //       loader: 'url-loader',
      //       options: {
      //         //限制图片大小,大于limit会找file-loader
      //         limit: 9999
      //       }
      //     }
      //   ]
      // },
      // 在使用webpack进行打包时,对图片路径的处理方法常用的有两种,一种是file-loader,
      // 一种是url-loader,当我们使用其中一种是,请把另一种删掉,不然会出现图片无法正常显示的问题
      {
        test: /\.(png|jpg|gif)$/,
        use: [
          {
            loader: 'file-loader',
            options: {
              //name是文件名,hash取8位,ext是拓展名
              name:'img/[name].[hash:8].[ext]'
            }
          }
        ]
      },
      {
        test: /\.js$/,
        exclude: /(node_modules|bower_components)/,
        use: {
          loader: 'babel-loader',
          options: {
            presets: ['es2015']
          }
        }
      }
    ]
  }
};
webpack-vue
-
npm install vue -save
-
不写路径默认从node_modules引入 import Vue from ‘vue‘
-
runtime-only:是运行的时候代码不能包含任意一个template标签
-
runtime-compiler:代码中可以有template标签
- 解决3.4碰到的问题
 module:{

  resolve:{
    alias:{
      // vue$正则,表示导入的时候会检测vue指向的文件夹,如果这里不指定,会去找默认的runtime-only
      'vue$':'vue/dist/vue.esm.js'
    }
  }
//使用vue
import Vue from 'vue';


const App = {
    template: `
    <h2>{{msg}}</h2>
    `,
    data() {
        return {
            msg: 'hello world'

        };
    }
};

new Vue({
    el: '#app',
    // template和el关系是,这里的template会替换el的标签
    template: `<App/>`,
    components: {
        App
    }
});
将组件的代码提出去
- 新建一个.vue文件
<template>
  <h2>{{msg}}</h2>
  <span class="title">{{tit}}</span>
</template>

<script>
  export default {
    name: "App",
    data() {
      return {
        msg: 'hello world',
        tit:'title'
      };
    }
  }
</script>

<style scoped>
.title{
  color: red;
}
</style>- npm install vue-loader vue-template-compiler –save -dev
- 会出现版本过高的问题 安装一个低版本的
- 编辑package.json中的版本号,会根据你的大版本找一个合适的,必须重新npm install
webpack-plugin
- 安装打包静态文件:npm install –save-dev html-webpack-plugin
- 压缩js文件替换变量为更简单的:npm install uglifyjs-webpack-plugin@1.1.1 –save -dev 指定的vueCli 2
webpack-dev-server
-
全局安装:可以不用
npm install webpack-dev-server -g -
开发环境:
npm install webpack-dev-server -save -dev -
配置参数:
--content-base //设定webpack-dev-server的director根目录。如果不进行设定的话,默认是在当前目录下。 --quiet: //控制台中不输出打包的信息,开发中一般设置为false,进行 打印,这样查看错误比较方面 --no-info: // 不显示任何信息 --colors: //对信息进行颜色输出 --no-colors: //对信息不进行颜色输出 --compress: //开启gzip压缩 --host <hostname/ip>: //设置ip --port <number>: //设置端口号,默认是:8080 --inline: //webpack-dev-server会在你的webpack.config.js的入口配置文件中再添加一个入口, --hot: //开发热替换 --open: //启动命令,自动打开浏览器 --history-api-fallback: //查看历史url -
两种方式:
- 直接scripts中使用:“dev”: “webpack-dev-server –contentBase src –port 80 –hot –colors”
- 配置文件:
plugins: [ new webpack.BannerPlugin('最终版权是小明'), //打包静态资源,并且指定模板 new htmlWebpackPlugin({ template:`index.html` }), //压缩js new UglifyJsWebpackPlugin(), //热加载,不会全部加载,只加载改动的地方,配置了hot就需要配置,直接在命令中使用--hot就不需要配置这个插件 // new webpack.HotModuleReplacementPlugin() ], // devServer: { // contentBase: 'src', // port: 80, // hot:true // }, -
报错可能是版本问题
webpack.config.js配置文件
//node的包里面的path模块,用来拼接绝对路径
const path = require('path');
const webpack = require('webpack');
const htmlWebpackPlugin = require('html-webpack-plugin');
const UglifyJsWebpackPlugin = require('uglifyjs-webpack-plugin');

//这里要用commonjs导出,不能用es6
module.exports = {
  entry: './src/main.js',
  output: {
    //必须使用绝对路径
    path: path.resolve(__dirname, 'dist'),
    filename: 'bundle.js',
    //为所有的url相关的添加路径
    // publicPath: 'dist/'
  },
  module: {
    rules: [
      {
        test: /\.css$/,
        // style-loader将模块的导出作为样式添加到 DOM 中
        // loader解析 CSS 文件后,使用 import 加载,并且返回 CSS 代码
        // 从右到左的顺序加载
        use: ['style-loader', 'css-loader']
      },
      // {
      //   test: /\.(png|jpg|gif)$/,
      //   use: [
      //     {
      //       loader: 'url-loader',
      //       options: {
      //         //限制图片大小,大于limit会找file-loader
      //         limit: 9999
      //       }
      //     }
      //   ]
      // },
      // 在使用webpack进行打包时,对图片路径的处理方法常用的有两种,一种是file-loader,
      // 一种是url-loader,当我们使用其中一种是,请把另一种删掉,不然会出现图片无法正常显示的问题
      {
        test: /\.(png|jpg|gif)$/,
        use: [
          {
            loader: 'file-loader',
            options: {
            //name是文件名,hash取8位,ext是拓展名
              name: 'img/[name].[hash:8].[ext]'
            }
          }
        ]
      },
      {
        test: /\.js$/,
        exclude: /(node_modules|bower_components)/,
        use: {
          loader: 'babel-loader',
          options: {
            presets: ['es2015']
          }
        }
      },
      {
        test: /\.vue$/,
        use: {
          loader: 'vue-loader'
        }
      }
    ]
  },
  resolve: {
    // 这写拓展名可以省略
    extensions: ['.css', '.js', '.vue'],
    alias: {
      // vue$正则,表示导入的时候会检测vue指向的文件夹,如果这里不指定,会去找默认的runtime-only
      'vue$': 'vue/dist/vue.esm.js'
    }
  },
  plugins: [
    new webpack.BannerPlugin('最终版权是小明'),
    //打包静态资源,并且指定模板
    new htmlWebpackPlugin({
      template:`index.html`
    }),
    //压缩js
    new UglifyJsWebpackPlugin(),
    //热加载,不会全部加载,只加载改动的地方,配置了hot就需要配置,直接在命令中使用--hot就不需要配置这个插件
    // new webpack.HotModuleReplacementPlugin()
  ],
  // devServer: {
  //   contentBase: 'src',
  //   port: 80,
  //   hot:true
  // },
};
抽取分离配置文件
-
创建三个配置文件:
- base.config.js : 存放公共的配置
//node的包里面的path模块,用来拼接绝对路径 const path = require('path'); const webpack = require('webpack'); const htmlWebpackPlugin = require('html-webpack-plugin'); //这里要用commonjs导出,不能用es6 module.exports = { entry: './src/main.js', output: { //必须使用绝对路径 path: path.resolve(__dirname, '../dist'), filename: 'bundle.js', }, module: { rules: [ { test: /\.css$/, // style-loader将模块的导出作为样式添加到 DOM 中 // loader解析 CSS 文件后,使用 import 加载,并且返回 CSS 代码 // 从右到左的顺序加载 use: ['style-loader', 'css-loader'] }, { test: /\.(png|jpg|gif)$/, use: [ { loader: 'file-loader', options: { //name是文件名,hash取8位,ext是拓展名 name: 'img/[name].[hash:8].[ext]' } } ] }, { test: /\.js$/, exclude: /(node_modules|bower_components)/, use: { loader: 'babel-loader', options: { presets: ['es2015'] } } }, { test: /\.vue$/, use: { loader: 'vue-loader' } } ] }, resolve: { // 这写拓展名可以省略 extensions: ['.css', '.js', '.vue'], alias: { // vue$正则,表示导入的时候会检测vue指向的文件夹,如果这里不指定,会去找默认的runtime-only 'vue$': 'vue/dist/vue.esm.js' } }, plugins: [ new webpack.BannerPlugin('最终版权是小明'), //打包静态资源,并且指定模板 new htmlWebpackPlugin({ template: `index.html` }) ], };-
dev.config.js : 存放开发时配置
const WebpackMerge = require('webpack-merge'); const baseConfig = require('./base.config'); module.exports = WebpackMerge(baseConfig, { devServer: { contentBase: 'src', port: 80, inline: true } }); -
prod.config.js : 存放生产时配置
const UglifyJsWebpackPlugin = require('uglifyjs-webpack-plugin');
const WebpackMerge = require('webpack-merge');
const baseConfig = require('./base.config');

module.exports = WebpackMerge(baseConfig, {
    plugins: [
        //压缩js
        new UglifyJsWebpackPlugin()
    ]
});
-
修改scripts
- 可删除默认的webpack.config.js
"scripts": {
    "test": "echo \"Error: no test specified\" && exit 1",
    "dev": "webpack-dev-server --config ./build/dev.config.js",
    "build": "webpack --config ./build/prod.config.js"
  },
打包
-
使用webpack,也可以不用配置文件自己在命令后指定参数,以下是使用配置文件

-
使用npm,会找到package.json找到对应的script里的命令执行,实际上还是调用了webpack命令