
一、开发webservice接口的方式
1、使用jdk开发
2、使用第三方工具,如cxf、shiro等
二、使用jdk开发webservice接口以及调用
首先定义一个天气预报的接口,Weather
@WebService
public interface Weather {
    String queryWeather();
}
定义一个实现类,实现该接口
@WebService
public class WeatherImpl implements Weather{
    public String queryWeather() {
        return "今日天气为晴,偏北风二到三级";
    }
}
写一个普通的类,使其继承自spring的上下文监听器,并在初始化方法中发布接口,这样在容器启动时自动会发布

public class MyListener extends ContextLoaderListener{

    public void contextInitialized(ServletContextEvent event) {
        String address="http://localhost:8080/weather";
        Endpoint.publish(address, new WeatherImpl());
        super.contextInitialized(event);
    }
}
在web容器中设置该监听器
 <listener>
      <listener-class>springframe.listener.MyListener</listener-class>
  </listener>
启动容器(如果启动过程中报错:出现类似
Wrapper class webservice.jaxws.SayHi is not found. Have you run APT to generate them?
则说明使用的jdk版本过低,请使用jdk1.6或更高),访问http://localhost:8080/weather,结果如下:

表示发布成功。
接下来是如何调用一个发布的webservice接口
新建一个项目test_p
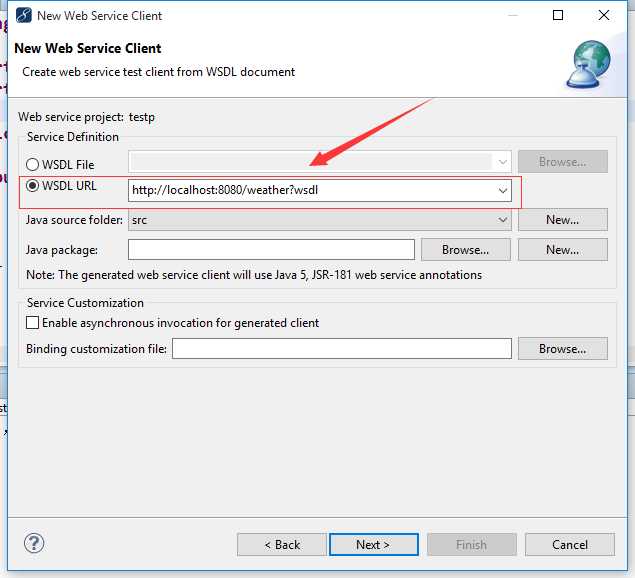
选中项目,鼠标右键,选择NEW,选择other,找到web service client,next,在弹出的框中选择WSDL URL,病输入wsdl的url,这里是http://localhost:8080/weather?wsdl,next,finish

然后为我们生成了一堆类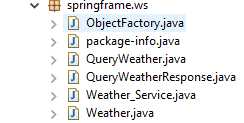
不过我们只需用到最后两个,Weather_service和Weather
下面写一个main方法
public static void main(String[] args) {
        Weather_Service factory=new Weather_Service();
        Weather wea=factory.getWeatherImplPort();
        System.out.println(wea.queryWeather());
    }
执行,会输出如下的结果:

代表调用成功。
注意:如果webservice用到的端口最好与tomcat的访问端口不一样,否则,会出现无法访问项目。
三、使用cxf开发webservice接口
待定。。
from:https://www.cnblogs.com/yxjdragon/p/6030740.html