Android Design Support控件之DrawerLayout简单使用

DrawerLayout能够让我们在项目中非常方便地实现側滑菜单效果。如今主流的应用如QQ等都
採用的这样的效果。
这两天也是在学习Android Design Support的相关知识。网上有关这方面的文章介绍非常多。可是为了方便以后使用,还是把学习的知识做个简单记录。这次的代码也是在上一篇博客Android Design Support控件介绍之TabLayout的基础上加入的布局和代码。
主界面布局:
<?xml version="1.0" encoding="utf-8"?>
<android.support.v4.widget.DrawerLayout xmlns:android="http://schemas.android.com/apk/res/android" xmlns:app="http://schemas.android.com/apk/res-auto" android:id="@+id/drawer_view" android:layout_width="match_parent" android:layout_height="match_parent">


    <android.support.design.widget.NavigationView  android:id="@+id/navigation_view" android:layout_width="200dp" android:layout_height="match_parent" android:layout_gravity="left" android:fitsSystemWindows="true" app:headerLayout="@layout/content_main"><!--content_main与上篇文章中一样-->
    </android.support.design.widget.NavigationView>
</android.support.v4.widget.DrawerLayout>
側滑菜单左側的布局
<?xml version="1.0" encoding="utf-8"?> <LinearLayout xmlns:android="http://schemas.android.com/apk/res/android" xmlns:app="http://schemas.android.com/apk/res-auto" android:layout_width="match_parent" android:layout_height="match_parent" android:orientation="vertical" android:padding="10dp"> <TextView android:layout_width="wrap_content" android:layout_height="wrap_content" android:layout_marginTop="40dp" android:text="菜单ONE" /> <TextView android:layout_width="wrap_content" android:layout_height="wrap_content" android:layout_marginTop="20dp" android:text="菜单TWO" /> <TextView android:layout_width="wrap_content" android:layout_height="wrap_content" android:layout_marginTop="20dp" android:text="菜单THREE" /> <TextView android:layout_width="wrap_content" android:layout_height="wrap_content" android:layout_marginTop="20dp" android:text="菜单FOUR" /> <TextView android:layout_width="wrap_content" android:layout_height="wrap_content" android:layout_marginTop="20dp" android:text="菜单FIVE" /> </LinearLayout>
Fragment界面布局
<?xml version="1.0" encoding="utf-8"?> <LinearLayout xmlns:android="http://schemas.android.com/apk/res/android" xmlns:app="http://schemas.android.com/apk/res-auto" android:layout_width="match_parent" android:layout_height="match_parent" android:orientation="vertical" android:padding="10dp"> <TextView android:id="@+id/content_tv" android:layout_width="wrap_content" android:layout_height="wrap_content" android:layout_marginTop="40dp" android:text="菜单ONE" /> </LinearLayout>
主界面代码,TestAdapter 及TestFragment代码也同上一篇文章一样。
public class MainActivity extends FragmentActivity {
    //便捷实现标签显示
    private TabLayout tab_layout;
    private ViewPager viewpager;
    private TestAdapter mAdapter;
    private List<Fragment> fragments;
    private List<String> titles;
    private DrawerLayout drawer_view;

    @Override
    protected void onCreate(Bundle savedInstanceState) {
        super.onCreate(savedInstanceState);
        setContentView(R.layout.drawer_layout);
        initViews();
        initViewPages();
    }

    private void initViewPages() {
        fragments = new ArrayList<>();
        titles = new ArrayList<>();
        for (int i = 0; i < 4; i++) {
            String title="TAB" + i;
            titles.add(title);
            tab_layout.addTab(tab_layout.newTab().setText(title));//加入Tab标题
            Fragment fragment = new TestFragment();
            Bundle bundle = new Bundle();
            bundle.putString("content", "这是第" + i + "个Fragment页面");
            fragment.setArguments(bundle);
            fragments.add(fragment);
        }

        mAdapter = new TestAdapter(this.getSupportFragmentManager(), titles, fragments);
        viewpager.setAdapter(mAdapter);
        tab_layout.setupWithViewPager(viewpager);
        tab_layout.setTabsFromPagerAdapter(mAdapter);

    }

    private void initViews() {
        tab_layout = (TabLayout) findViewById(R.id.tab_layout);
        viewpager = (ViewPager) findViewById(R.id.viewpager);
        drawer_view=(DrawerLayout)findViewById(R.id.drawer_view);
        drawer_view.closeDrawer(GravityCompat.START);
    }
}
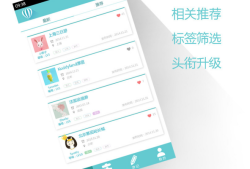
效果图:


最新文章
-
微信隐藏功能有哪些
2026-10-19 -
微信引用回复怎么操作
2026-10-19 -
微信拉黑和删除怎么区分
2026-10-19 -
微信怎么清理缓存不丢记录
2026-10-19 -
微信如何发送高清原图
2026-10-19 -
微信延时转账怎么设置
2026-10-19 -
微信收藏如何分类整理
2026-10-19 -
微信消息撤回有时间限制吗
2026-10-19
热门文章
-

微信小程序 - 事件绑定bind和catch 区别
2026-07-04 -

微信浏览器中禁止app下载链接的两种处理方法
2026-07-04 -
ios微信分享的兼容性问题
2026-07-04 -

7-STM32物联网开发WIFI(ESP8266)+GPRS(Air202)系统方案微信小程序篇(微信配网_申请微信公众号)
2026-07-04 -

【php】PHP制作QQ微信支付宝三合一收款码
2026-07-04 -

小程序-微信聊天功能开发详解
2026-07-04 -
10-STM32物联网开发WIFI(ESP8266)+GPRS(Air202)系统方案微信小程序篇(微信配网配置_Airkiss步骤_1)
2026-07-04 -
9-STM32物联网开发WIFI(ESP8266)+GPRS(Air202)系统方案微信小程序篇(微信配网配置_开发者基本配置_2)
2026-07-04