Android ScrollView滚动实现大众点评、网易云音乐评论悬停效果

今天听着网易云音乐,写着代码,真是爽翻了。
http://blog.csdn.net/linshijun33/article/details/47910833
网易云音乐这个产品亮点应该在评论这一模块,于是我就去看了下评论区,发现一个它是用的一个ScrollView,从上到下可分为三部分。最上面是音乐封面。接着是精彩评论,然后是最新评论。手指在上面滚动一段距离。精彩评论就在布局顶部悬停,再接着滚动,最新评论就替代精彩评论在布局顶部悬停,十分有趣的一个特点。

然后又去翻了一下大众点评APP,发现也是运用到这个悬停效果。

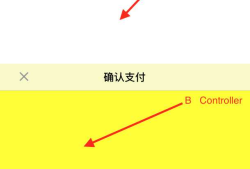
价格显示悬停在顶部了
这一个真是非常用心的举动。价格消费者时时都能够看得到。多么良好的用户体验,能够非常好地提高产品的转化率呢。真是机智。
确实要在用户交互上面花点功夫呢。

于是想着怎么去实现这种效果。去找了资料来看。大概是这么做到的。
老规矩,先上效果图。

然后是悬停,图片是截取的。有点变形。

先上布局文件activity_main.xml,设置了控件有四个,一个自己定义MyScrollView(布局后面给出代码),两个ImageView,一个TextView( 用来充字数占空间让屏幕滚动起来的)。
activity_main.xml
<RelativeLayout xmlns:android="http://schemas.android.com/apk/res/android" xmlns:tools="http://schemas.android.com/tools" android:id="@+id/box" android:layout_width="match_parent" android:layout_height="match_parent" tools:context=".MainActivity">

    <com.topfloat.MyScrollView  android:id="@+id/myScrollView" android:layout_width="fill_parent" android:layout_height="match_parent">

        <LinearLayout  android:layout_width="match_parent" android:layout_height="wrap_content" android:orientation="vertical">

            <RelativeLayout  android:id="@+id/rlayout" android:layout_width="fill_parent" android:layout_height="wrap_content" >

                <ImageView  android:id="@+id/top" android:layout_width="fill_parent" android:layout_height="wrap_content" android:background="@mipmap/top_show" android:layout_alignParentBottom="true" />
            </RelativeLayout>

            <LinearLayout  android:id="@+id/bind_2" android:layout_width="match_parent" android:layout_height="wrap_content" android:orientation="vertical">

                <ImageView  android:id="@+id/buy_price" android:layout_width="fill_parent" android:layout_height="wrap_content" android:background="@mipmap/buy_price" />
            </LinearLayout>

            <TextView  android:layout_width="match_parent" android:layout_height="wrap_content" android:gravity="center_horizontal" android:text="下面内容自己脑补\n下面内容自己脑补\n下面内容自己脑补\n下面内容自己脑补\n下面内容自己脑补\n下面内容自己脑补\n 下面内容自己脑补\n下面内容自己脑补\n下面内容自己脑补\n下面内容自己脑补\n下面内容自己脑补\n下面内容自己脑补\n 下面内容自己脑补\n下面内容自己脑补\n下面内容自己脑补\n下面内容自己脑补\n下面内容自己脑补\n下面内容自己脑补\n 下面内容自己脑补\n下面内容自己脑补\n下面内容自己脑补\n下面内容自己脑补\n下面内容自己脑补\n下面内容自己脑补\n" android:textSize="30sp"/>

        </LinearLayout>
    </com.topfloat.MyScrollView>

    <LinearLayout  android:id="@+id/bing_1" android:layout_width="match_parent" android:layout_height="wrap_content" android:orientation="vertical">

    </LinearLayout>

</RelativeLayout>
然后给出的是自己定义控件MyScrollView
MyScrollView
package com.topfloat;

/** * Created by Linshijun on 2015/8/23. */


import android.content.Context;
import android.os.Handler;
import android.util.AttributeSet;
import android.view.MotionEvent;
import android.widget.ScrollView;

/* * ScrollView并没有实现滚动监听。所以我们必须自行实现对ScrollView的监听。 * 我们非常自然的想到在onTouchEvent()方法中实现对滚动Y轴进行监听 * ScrollView的滚动Y值进行监听 */
public class MyScrollView extends ScrollView {
    private OnScrollListener onScrollListener;
    /** * 主要是用在用户手指离开MyScrollView。MyScrollView还在继续滑动,我们用来保存Y的距离,然后做比較 */
    private int lastScrollY;

    public MyScrollView(Context context) {
        super(context, null);
    }

    public MyScrollView(Context context, AttributeSet attrs) {
        super(context, attrs, 0);
    }

    public MyScrollView(Context context, AttributeSet attrs, int defStyle) {
        super(context, attrs, defStyle);
    }

    /** * 设置滚动接口 * * @param onScrollListener */
    public void setOnScrollListener(OnScrollListener onScrollListener) {
        this.onScrollListener = onScrollListener;
    }

    /** * 用于用户手指离开MyScrollView的时候获取MyScrollView滚动的Y距离。然后回调给onScroll方法中 */
    private Handler handler = new Handler() {

        public void handleMessage(android.os.Message msg) {
            int scrollY = MyScrollView.this.getScrollY();

            //此时的距离和记录下的距离不相等,在隔5毫秒给handler发送消息
            if (lastScrollY != scrollY) {
                lastScrollY = scrollY;
                handler.sendMessageDelayed(handler.obtainMessage(), 5);
            }
            if (onScrollListener != null) {
                onScrollListener.onScroll(scrollY);
            }

        }


    };

    /** * 重写onTouchEvent。 当用户的手在MyScrollView上面的时候, * 直接将MyScrollView滑动的Y方向距离回调给onScroll方法中,当用户抬起手的时候。 * MyScrollView可能还在滑动。所以当用户抬起手我们隔5毫秒给handler发送消息,在handler处理 * MyScrollView滑动的距离 */
    @Override
    public boolean onTouchEvent(MotionEvent ev) {
        if (onScrollListener != null) {
            onScrollListener.onScroll(lastScrollY = this.getScrollY());
        }
        switch (ev.getAction()) {
            case MotionEvent.ACTION_UP:
                handler.sendMessageDelayed(handler.obtainMessage(), 5);
                break;
        }
        return super.onTouchEvent(ev);
    }

    /** * 滚动的回调接口 */
    public interface OnScrollListener {
        /** * 回调方法。 返回MyScrollView滑动的Y方向距离 */
        public void onScroll(int scrollY);
    }
}
ScrollView并没有实现滚动监听,所以必须自行实现对ScrollView的监听,由于滚动方向在Y轴,能够使用onTouchEvent()方法实现对滚动Y轴进行监听,而手指离开屏幕时,滚动还在继续,这时就须要选择在用户手指离开的时候每隔5毫秒来推断ScrollView是否停止滑动。并将ScrollView的滚动Y值回调给OnScrollListener接口的onScroll(int scrollY)方法中。
然后对ScrollView调用setOnScrollListener方法就能监听到滚动的Y值。
实现了上面两步。MainActivity就比較简单了。主要用了控件的从属关系来addview和removeview,这样做使代码更为简洁,更有适用性。
MainActivity
package com.topfloat;

import android.support.v7.app.AppCompatActivity;
import android.os.Bundle;
import android.view.Menu;
import android.view.MenuItem;
import android.widget.ImageView;
import android.widget.LinearLayout;
import android.widget.RelativeLayout;

/** * 实现OnScrollListener接口 */
public class MainActivity extends AppCompatActivity implements MyScrollView.OnScrollListener{

    private ImageView topshow,priceshow;
    private MyScrollView myScrollView;
    private int buypriceTop;

    LinearLayout bind_1,bind_2;


    RelativeLayout rlayout;

    @Override
    protected void onCreate(Bundle savedInstanceState) {
        super.onCreate(savedInstanceState);
        setContentView(R.layout.activity_main);
        //初始化控件
        initView();
    }

    private void initView() {
        topshow= (ImageView) findViewById(R.id.top);
        priceshow= (ImageView) findViewById(R.id.buy_price);
        myScrollView= (MyScrollView) findViewById(R.id.myScrollView);
        rlayout= (RelativeLayout) findViewById(R.id.rlayout);
        bind_1= (LinearLayout) findViewById(R.id.bing_1);
        bind_2= (LinearLayout) findViewById(R.id.bind_2);
        myScrollView.setOnScrollListener(this);
    }

    /** * 获取pirce_show的顶部位置,即rlayout的底部位置 * @param hasFocus */
    @Override
    public void onWindowFocusChanged(boolean hasFocus) {
        super.onWindowFocusChanged(hasFocus);
        if(hasFocus){
            buypriceTop=rlayout.getBottom(); //获取pirce_show的顶部位置。即rlayout的底部位置
        }
    }

    @Override
    public boolean onCreateOptionsMenu(Menu menu) {
        // Inflate the menu; this adds items to the action bar if it is present.
        getMenuInflater().inflate(R.menu.menu_main, menu);
        return true;
    }

    @Override
    public boolean onOptionsItemSelected(MenuItem item) {
        // Handle action bar item clicks here. The action bar will
        // automatically handle clicks on the Home/Up button, so long
        // as you specify a parent activity in AndroidManifest.xml.
        int id = item.getItemId();

        //noinspection SimplifiableIfStatement
        if (id == R.id.action_settings) {
            return true;
        }

        return super.onOptionsItemSelected(item);
    }

    /** * 监听滚动Y值变化。通过addView和removeView来实现悬停效果 * @param scrollY */
    @Override
    public void onScroll(int scrollY) {

        //推断滚动距离是否在于图片高度
        if(scrollY>=buypriceTop){
            if(priceshow.getParent()!=bind_1)  //推断其现有父类
            {
                bind_2.removeView(priceshow);  //从现有父类移除
                bind_1.addView(priceshow);  //加入到目标父类
            }
        }else {
            if(priceshow.getParent()!=bind_2)
            {
             bind_1.removeView(priceshow);
                bind_2.addView(priceshow);
            }
        }
    }
}
凝视里基本都将须要重点都说了,比較好理解。
Android Studio源代码稍后上传,有须要的能够下载来看看。
http://download.csdn.net/detail/linshijun33/9039237

最新文章
-

微信隐藏功能有哪些
2026-10-19 -
微信引用回复怎么操作
2026-10-19 -
微信拉黑和删除怎么区分
2026-10-19 -
微信怎么清理缓存不丢记录
2026-10-19 -
微信如何发送高清原图
2026-10-19 -
微信延时转账怎么设置
2026-10-19 -
微信收藏如何分类整理
2026-10-19 -
微信消息撤回有时间限制吗
2026-10-19
热门文章
-

微信小程序 - 事件绑定bind和catch 区别
2026-07-04 -

微信浏览器中禁止app下载链接的两种处理方法
2026-07-04 -
ios微信分享的兼容性问题
2026-07-04 -

7-STM32物联网开发WIFI(ESP8266)+GPRS(Air202)系统方案微信小程序篇(微信配网_申请微信公众号)
2026-07-04 -

【php】PHP制作QQ微信支付宝三合一收款码
2026-07-04 -

小程序-微信聊天功能开发详解
2026-07-04 -
10-STM32物联网开发WIFI(ESP8266)+GPRS(Air202)系统方案微信小程序篇(微信配网配置_Airkiss步骤_1)
2026-07-04 -
9-STM32物联网开发WIFI(ESP8266)+GPRS(Air202)系统方案微信小程序篇(微信配网配置_开发者基本配置_2)
2026-07-04